
Making sourdough bread is a 2 day process that starts with having a sourdough starter. Ask around, some of your friends of family may make sourdough and will give you starter. This is a great way to get it. If not, you can buy one, or make your own. You must also have patience, and the willingness to try, and try again.
Our first attempt at sourdough bread was an epic fail. In fact, the squirrels in the woods across from our house may have been pelted in the head with the rock hard pellet of bread that it made. Don’t give up. Who knows, your first attempt at this may be the best!
What is key in making sourdough bread is exact measurements and good quality ingredients. Not hard to do when it is only 4 that you need. We use King Arthur Flour in ours. Trust us, we ran out once, and subbed in another less expensive brand, and the result was not as good.
Be sure you have the time that it takes before you commit to this. This includes 5 hours available in your kitchen on day 1. This is only 15 minutes of active time. For those that work during the week, starting this on Saturday before noon is ideal! The results, will make you realize that the time invested is well worth it, when you butter that crunchy, chewy sourdough bread toast!
Ingredients
- 725 grams all-purpose flour We use King Arthur
- 550 grams bottled or filtered water
- 270 grams sourdough starter
- 20 grams flake sea salt
Instructions
Step 1:
- In a large bowl whisk sour dough starter and water until dissolved
- Note, mixture may foam a little bit
- Stir in flour with a spatula, until no dry flour remains
- Cover with a damp cotton dishcloth, and let sit for an hour
Step 2:
- After 1 hour, sprinkle the salt on top
- Keep a bowl of filtered water near, to wet your hands with
- Wet one hand with distilled water
- Starting at 12 o’clock position, pick up the dough with your wet hand and fold down into the middle
- Turn the bowl a quarter turn, & fold dough again
- Do this 4 times, to complete the 12 o clock, 3 o clock, 6 o clock and 9 clock folds
- Cover with moist towel, let sit for 30 minutes
- Note: keep track of times on a note pad, in order to mark off, each time you complete
Step 3:
- Repeat step 2 five more times, for a total of 6 folds
- Be sure to wet hand each time, with filtered water
- Cover each time, and let set for 30 minutes in between each of the 6 folds
Step 4:
- Once you have done the 6thfold, cover with moist towel and let sit for 1 hour
Step 5:
- Wipe the edges of the bowl with a paper towel to remove all the moisture
- Cover with plastic wrap
- Put in refrigerator, overnight for at least 12 hours
- Dough can stay in refrigerator up to 20 hours
Step 6:
- Dump dough onto lightly floured surface
- Using a bench scraper, cut the dough in half
- Using floured hands, form the 2 halves into balls with the same process as day 1
- Fold the dough 4 times
- Using hands, cup into a ball
- Do not knead the dough
- Let dough balls rest for 10 minutes
- Place dough in a rice flour sprinkled proofing bowls
- If you do not have proofing bowls, line a glass bowl with a thin linen or cotton tea towel
- Cover bowl with a lightly floured linen napkin or tea towel
- Place in refrigerator for 4-5 hours
Step 7:
- Place 2 oven proof Dutch ovens, with lids into oven on middle rack
- If you have a pizza stone, place it on rack below (this helps retain heat)
- Heat oven to 500 degrees for a full hour
- While oven is warming, cut 2 parchment rounds, a little large than the bottom interior of the pots
- Pull dough out of refrigerator
- Dump each loaf of dough onto parchment round
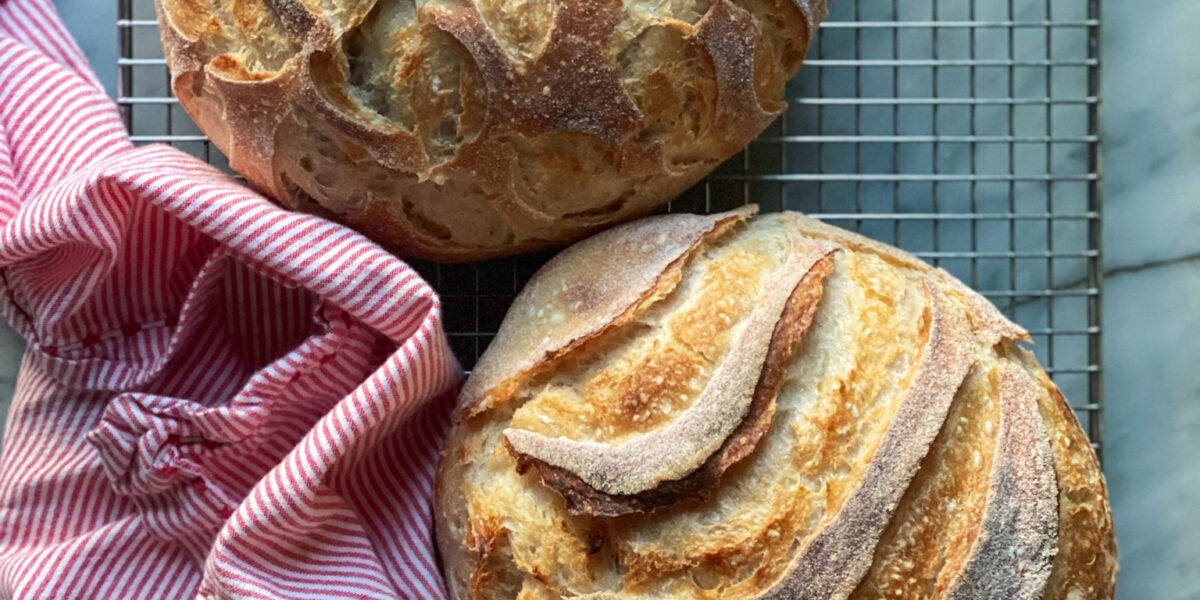
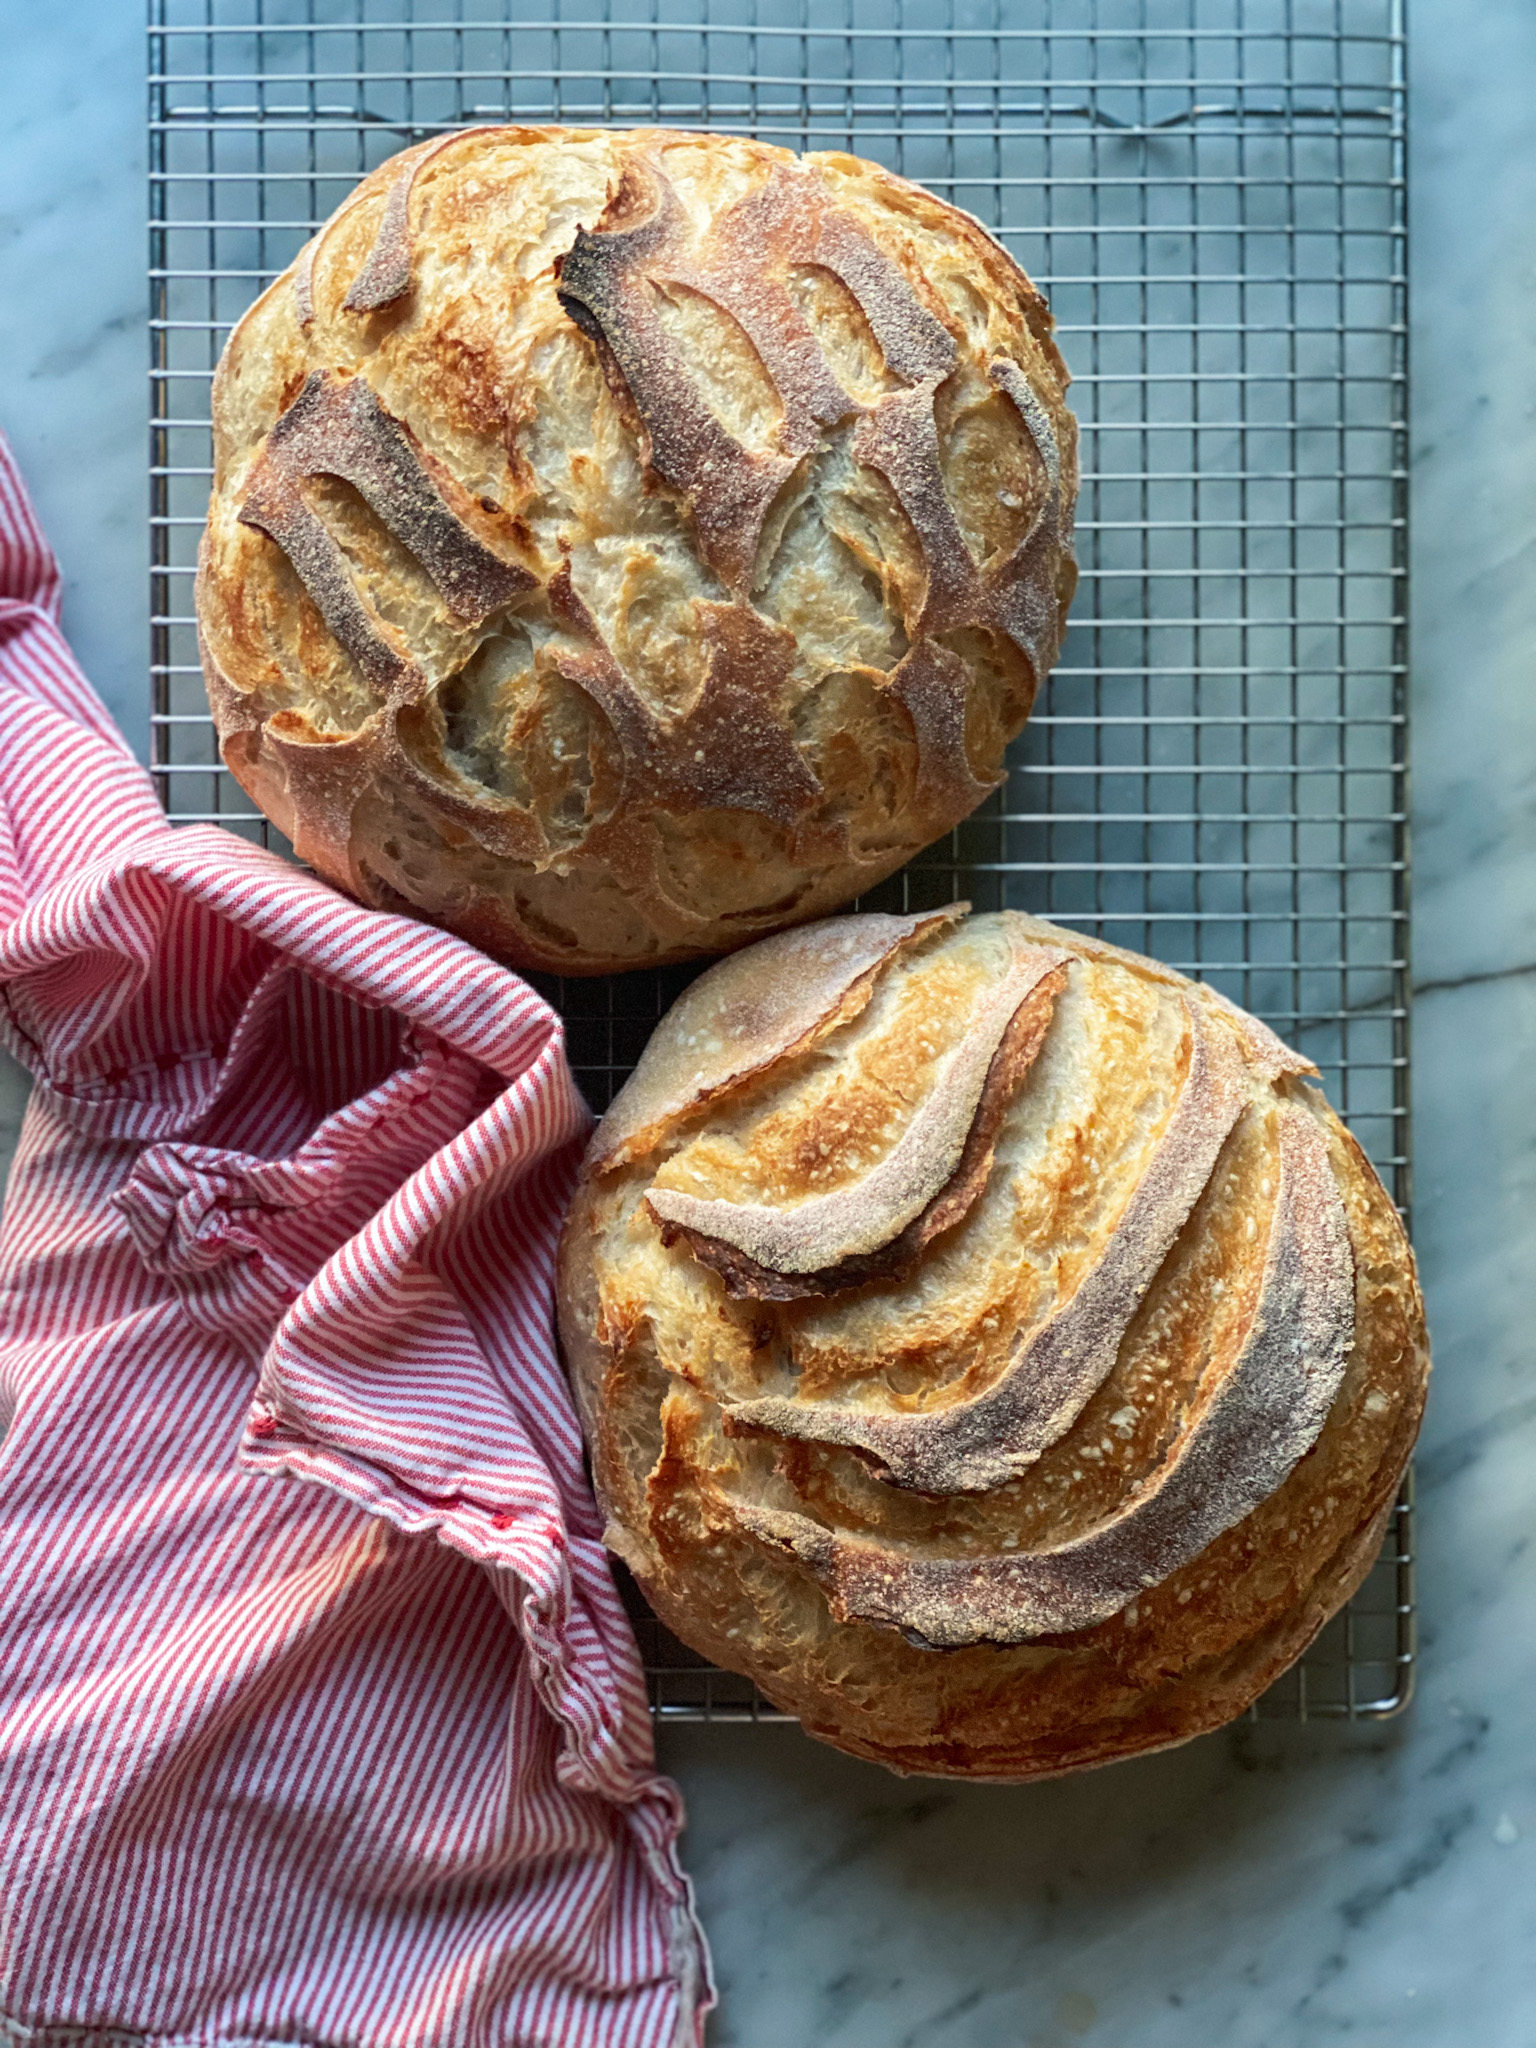
- Use a lame to cut the surface of the dough
- If you don’t have a lame, you can use a razor blade
- Working quickly, pull both heated Dutch ovens out of the oven, closing door behind
- Pick up the dough by grabbing the parchment from each side, and drop carefully into each Dutch oven
- Cover with lids, and return swiftly to hot oven
- Bake at 475 F for 30 minutes with lids on
- After 30 minutes, remove the lids, rotate pans ½ way
- Reduce oven temperature to 425 F
- Bake for another 20-25 minutes until loaves are golden brown
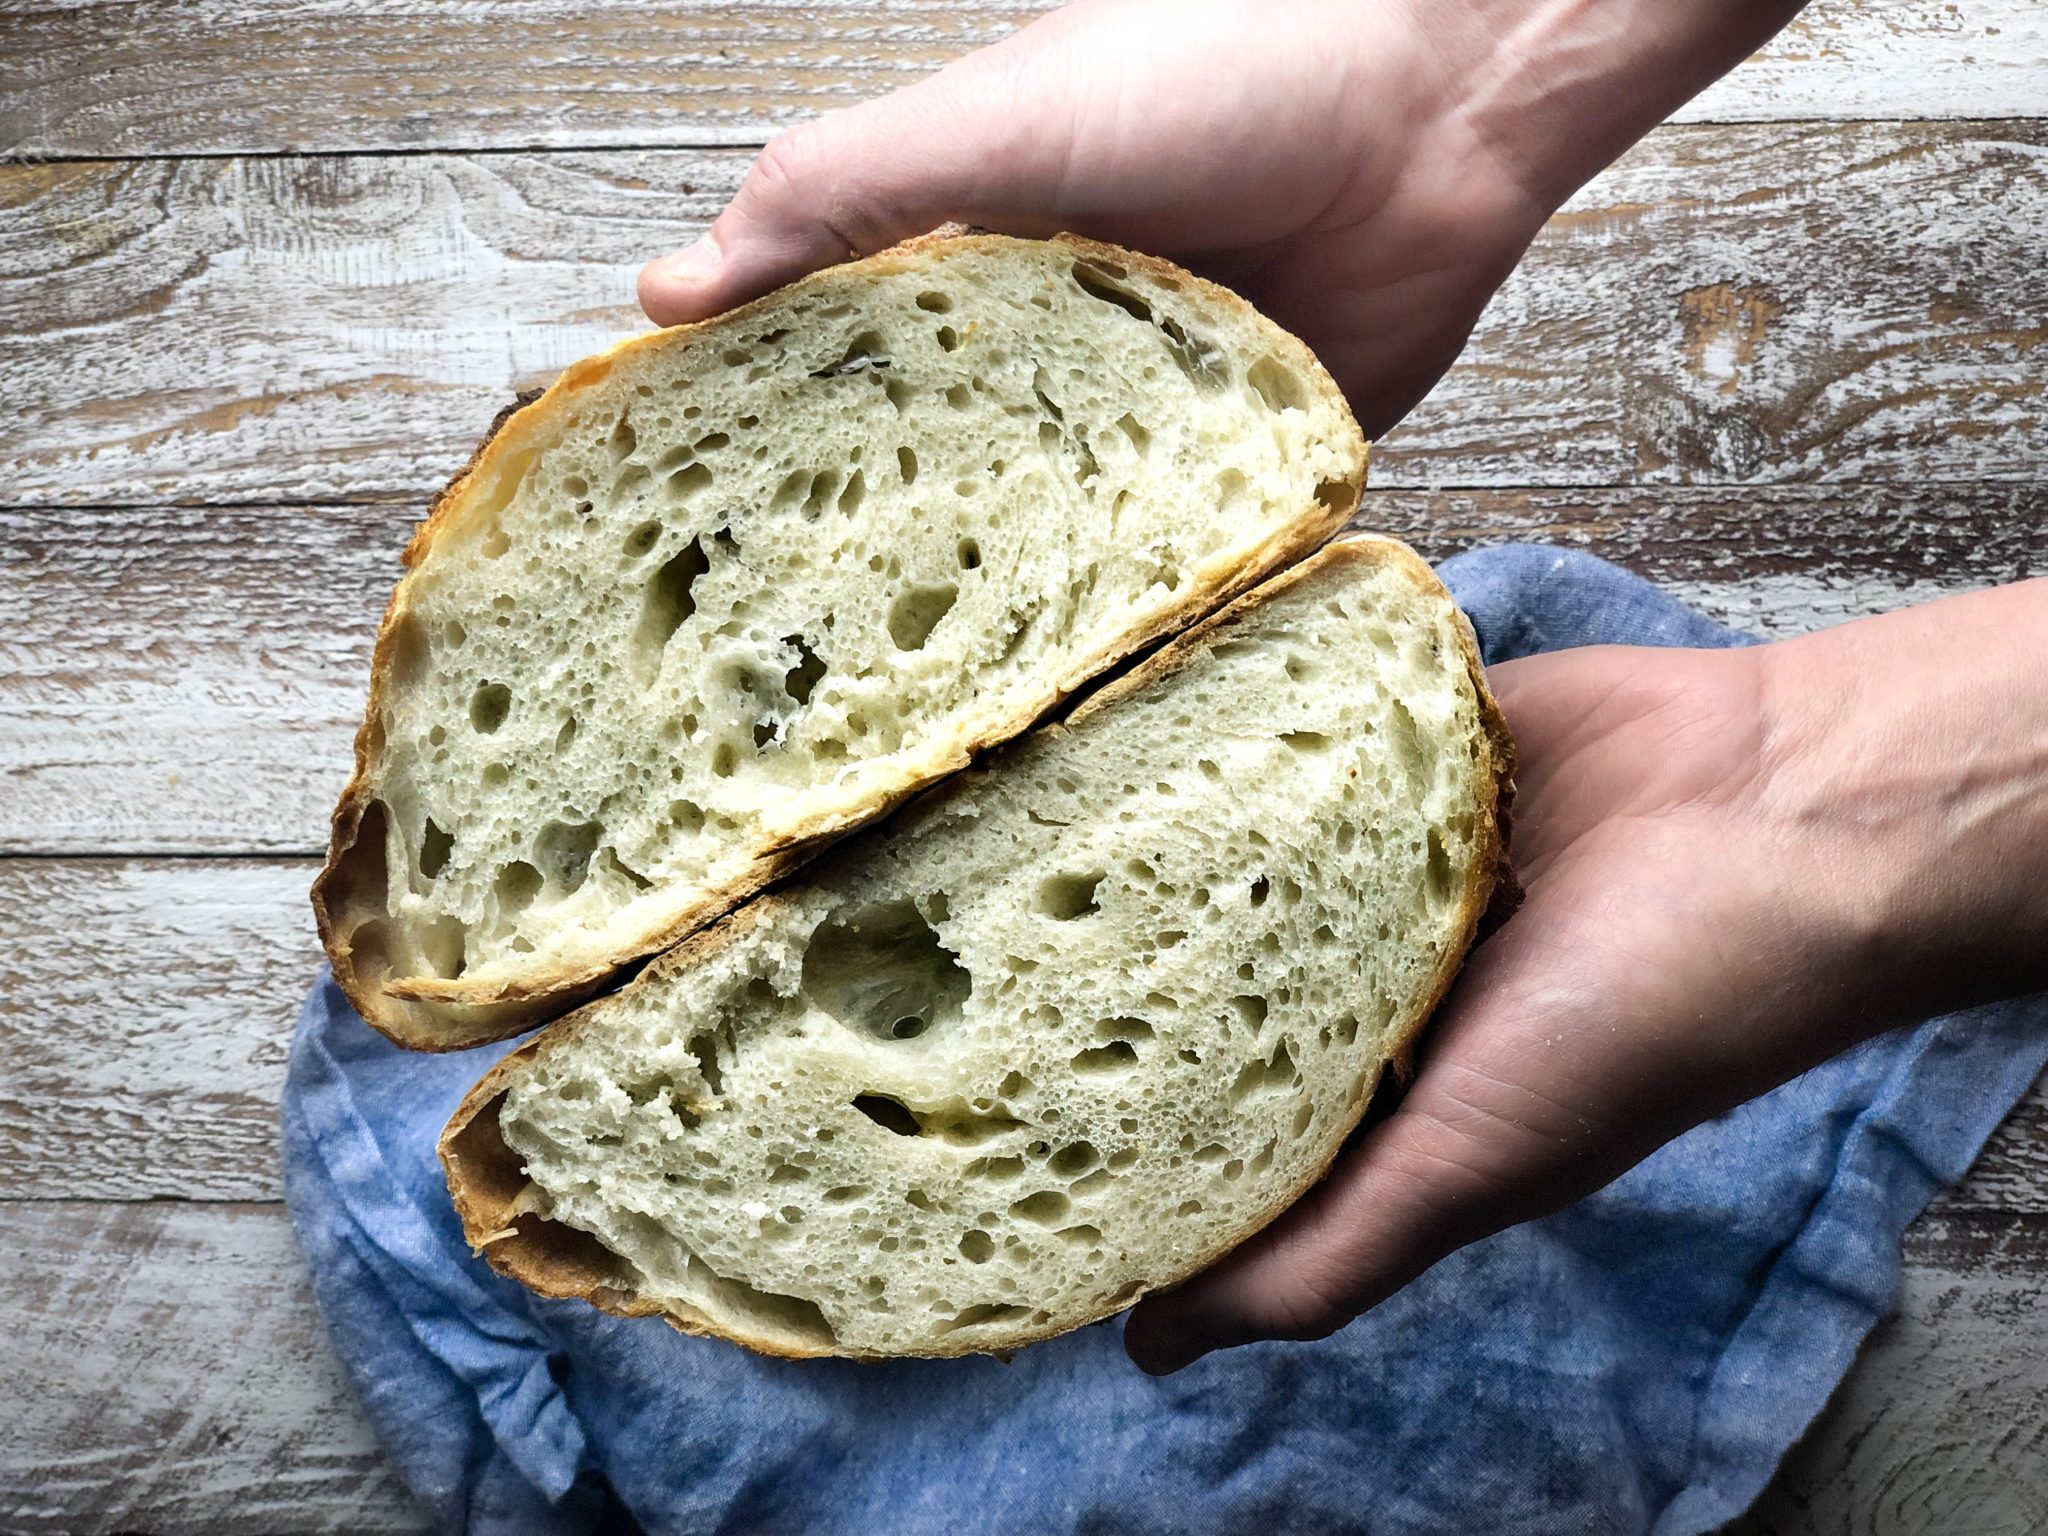
- Bread is done when has a hollow sound when thumped
- Cool for at least 2 hours before slicing, as dough continues to cook