This recipe for Easy Yeast Rolls for Beginners will have you baking every weekend!! Our mission here is to make baking accessible to everyone, and that’s why we’ve crafted the perfect guide to help you master the art of creating these delightful yeast rolls with ease. Even if you’re a complete beginner, we promise you’ll be amazed at the delicious results you’ll achieve.

And guess what? We have a special treat for you – a step-by-step guide on how to make ahead and freeze the dough balls so you can enjoy fresh-baked rolls whenever your heart desires! The best part? You don’t need fancy equipment or hard-to-find ingredients – just your love for baking and a few pantry staples!
So, prepare to dazzle your friends and family with the aroma of freshly baked yeast rolls wafting through your kitchen. We can’t wait to share our tips, tricks, and little baking secrets with you all. Together, we’ll unlock the secrets to heavenly, golden-brown rolls that’ll steal the spotlight at any gathering.
Are you ready to embark on this delightful baking adventure? Let’s get started on our journey to yeast roll perfection! Don’t forget to check out our “how to make ahead and freeze the dough balls” guide – because who doesn’t love the convenience of popping some dough in the freezer for instant, warm rolls later?
Let’s knead, rise, and bake our way to happiness – one irresistible yeast roll at a time!
Ingredients you’ll need for these easy yeast rolls for beginners:
- Flour – this is the staple ingredient for this recipe. We use King Arthur All purpose flour
- Active dry yeast – this particular type of yeast will help leaven the rolls providing an airy, light texture. We use Red Star active dry yeast.
- Salt – as with all recipes, salt makes things taste better! Alongside the butter in these rolls, it adds an extra layer of savory goodness to every bite.
- Eggs – Large eggs are used in this recipe. Get them out and set them on the counter to come to room temperature.
- Warm milk – Using whole milk instead of water in this recipe gives the rolls a richer flavor, and incredible texture.
- Sugar – White table sugar jump starts the yeast and adds just a hint of sweetness to this dough.
- Butter – we use salted butter in this recipe, which is what we keep on hand in our house.
Method
Step 1 (Dough Prep)
- Whisk together the flour and salt, Set aside. Whisk the yeast and sugar into the warm milk and let stand for 5 minutes. Whisk the eggs and butter into the milk mixture. Make a well in the flour mixture and pour the milk into the middle. Use a stiff spatula to mix the wet and dry ingredients together thoroughly.
- Cover the bowl with a warm moist dish towel for 15 minutes.
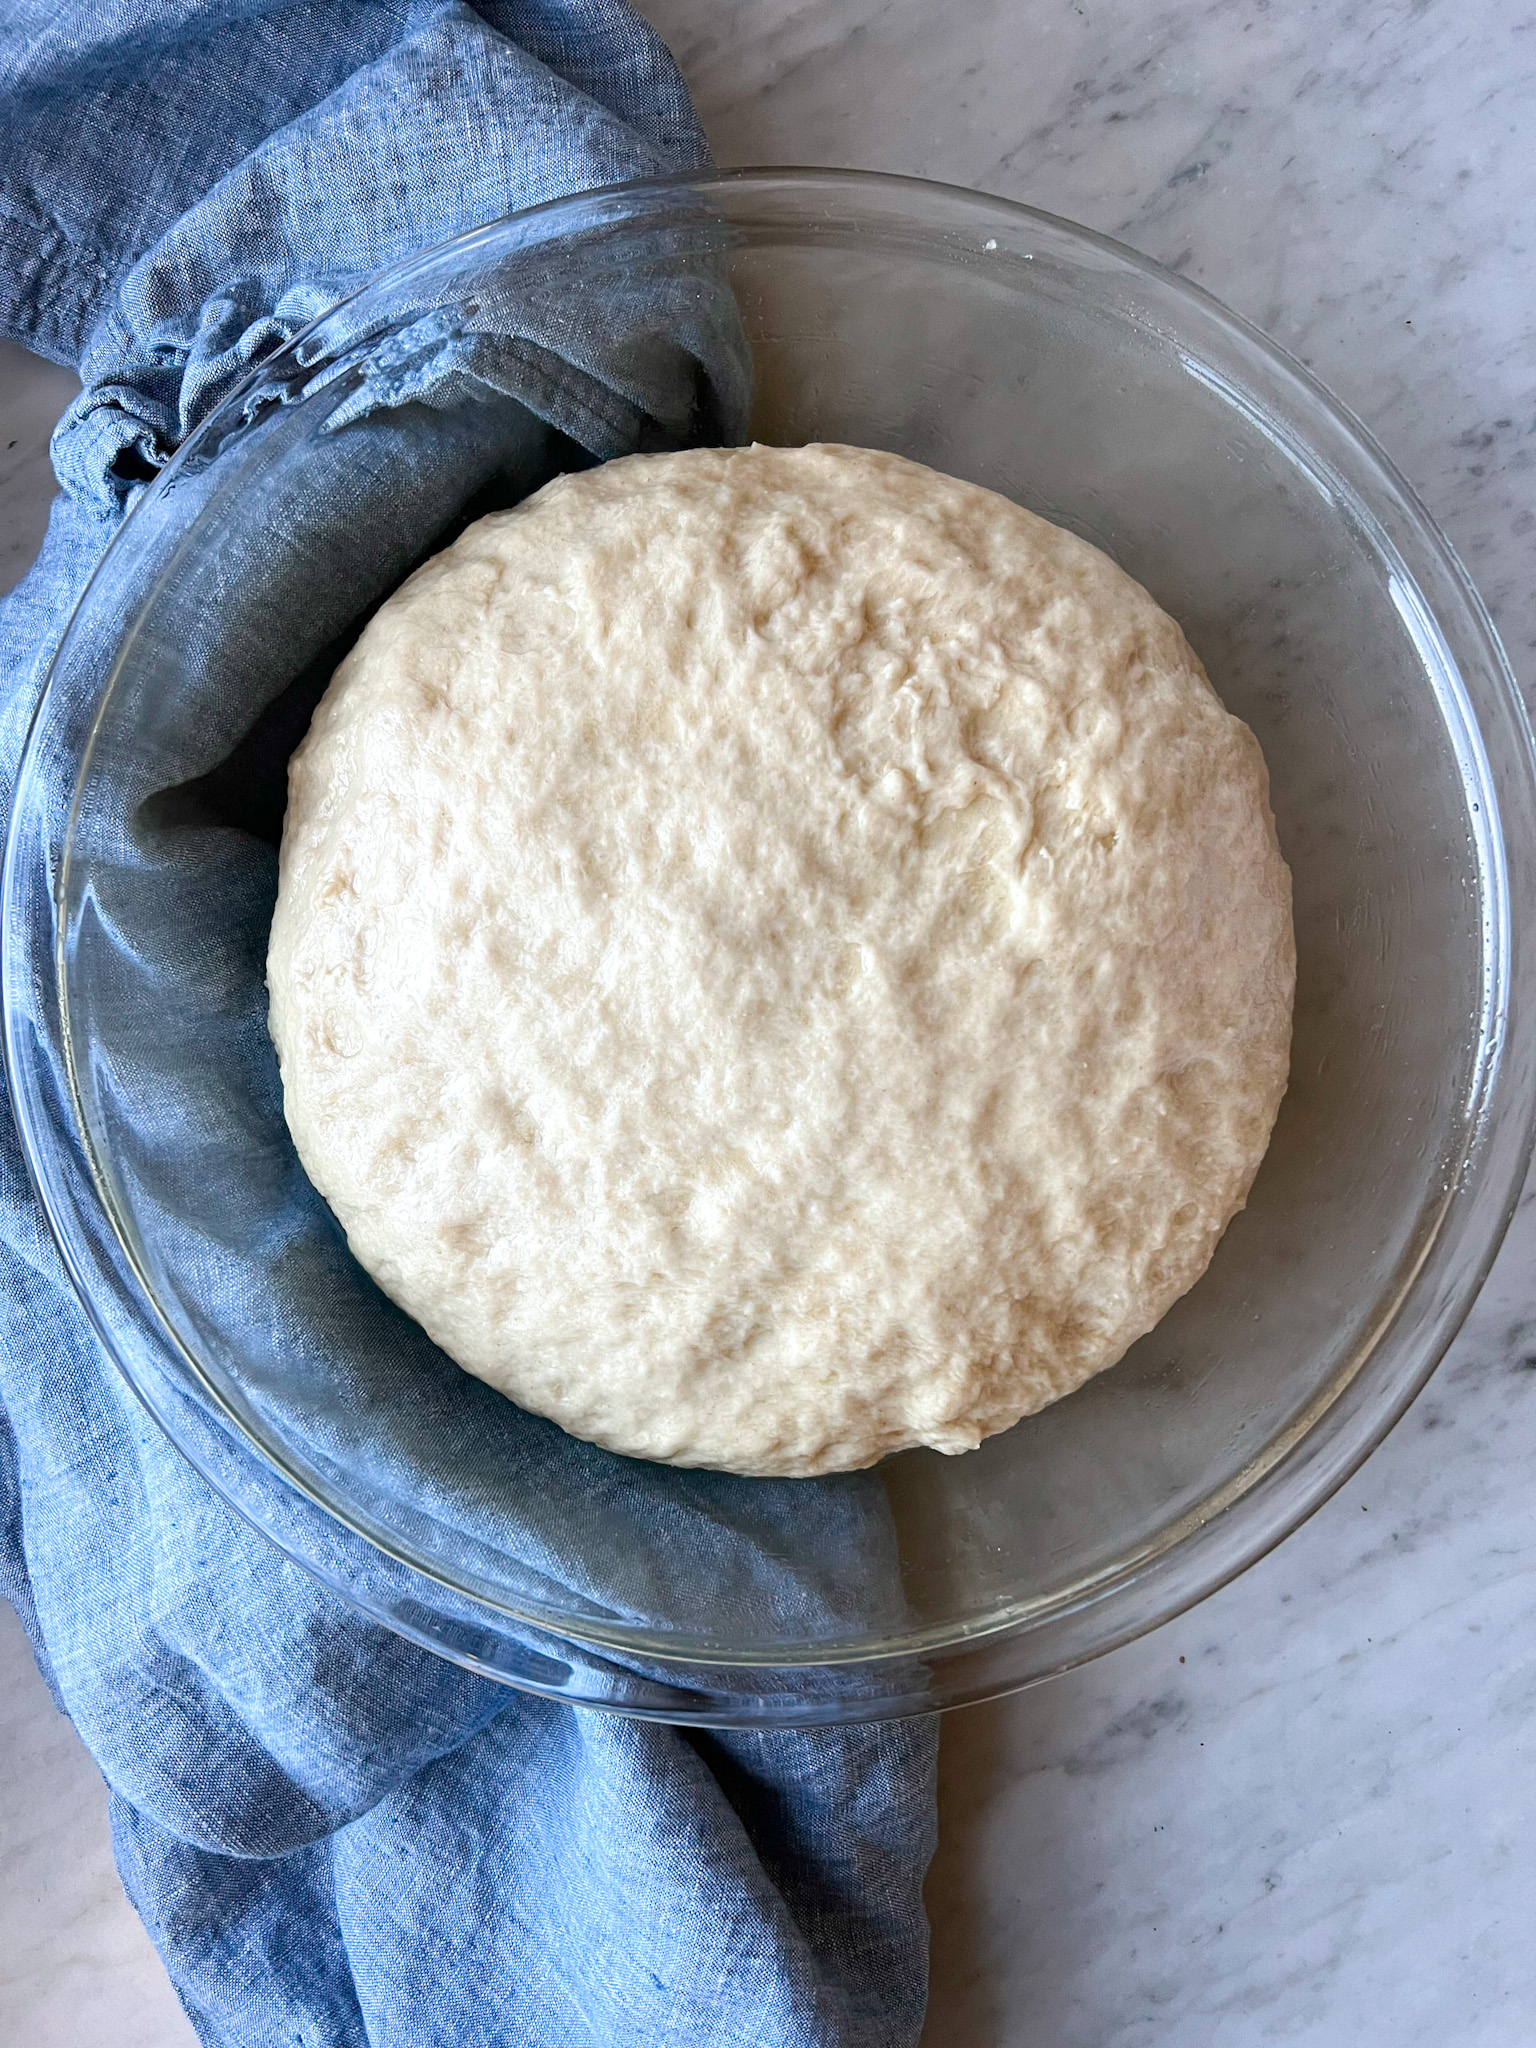
- Uncover the dough and dump out onto a lightly floured work area. Dust the dough with flour and knead for 5 minutes or until the dough forms a stiff ball. Oil a bowl with vegetable oil and place the dough ball seam side down into the bowl. Cover the top of the dough 2 teaspoons of vegetable oil to prevent cracking. Cover the bowl with a warm moist dish towel. Place the covered bowl in a warm place to rise. It should take about one hour for the dough to double in size.
Step 2 (Proving)
The second step of this recipe is proving, which is the process of letting the dough rise.
You might be wondering: why do we need to let our dough rise? Well, there are a few reasons why rising makes such a big difference to your finished product:
- It improves texture by adding air bubbles into the mix – those little pockets of air will make sure that when they bake they become fluffy and soft instead of dense and heavy like an old brick would!
- It improves flavor by letting sugar caramelize – this means that when baked properly (i.e., not burnt), your homemade bread rolls will taste exactly as good as bakery bought rolls!
Step 3 (Shaping)
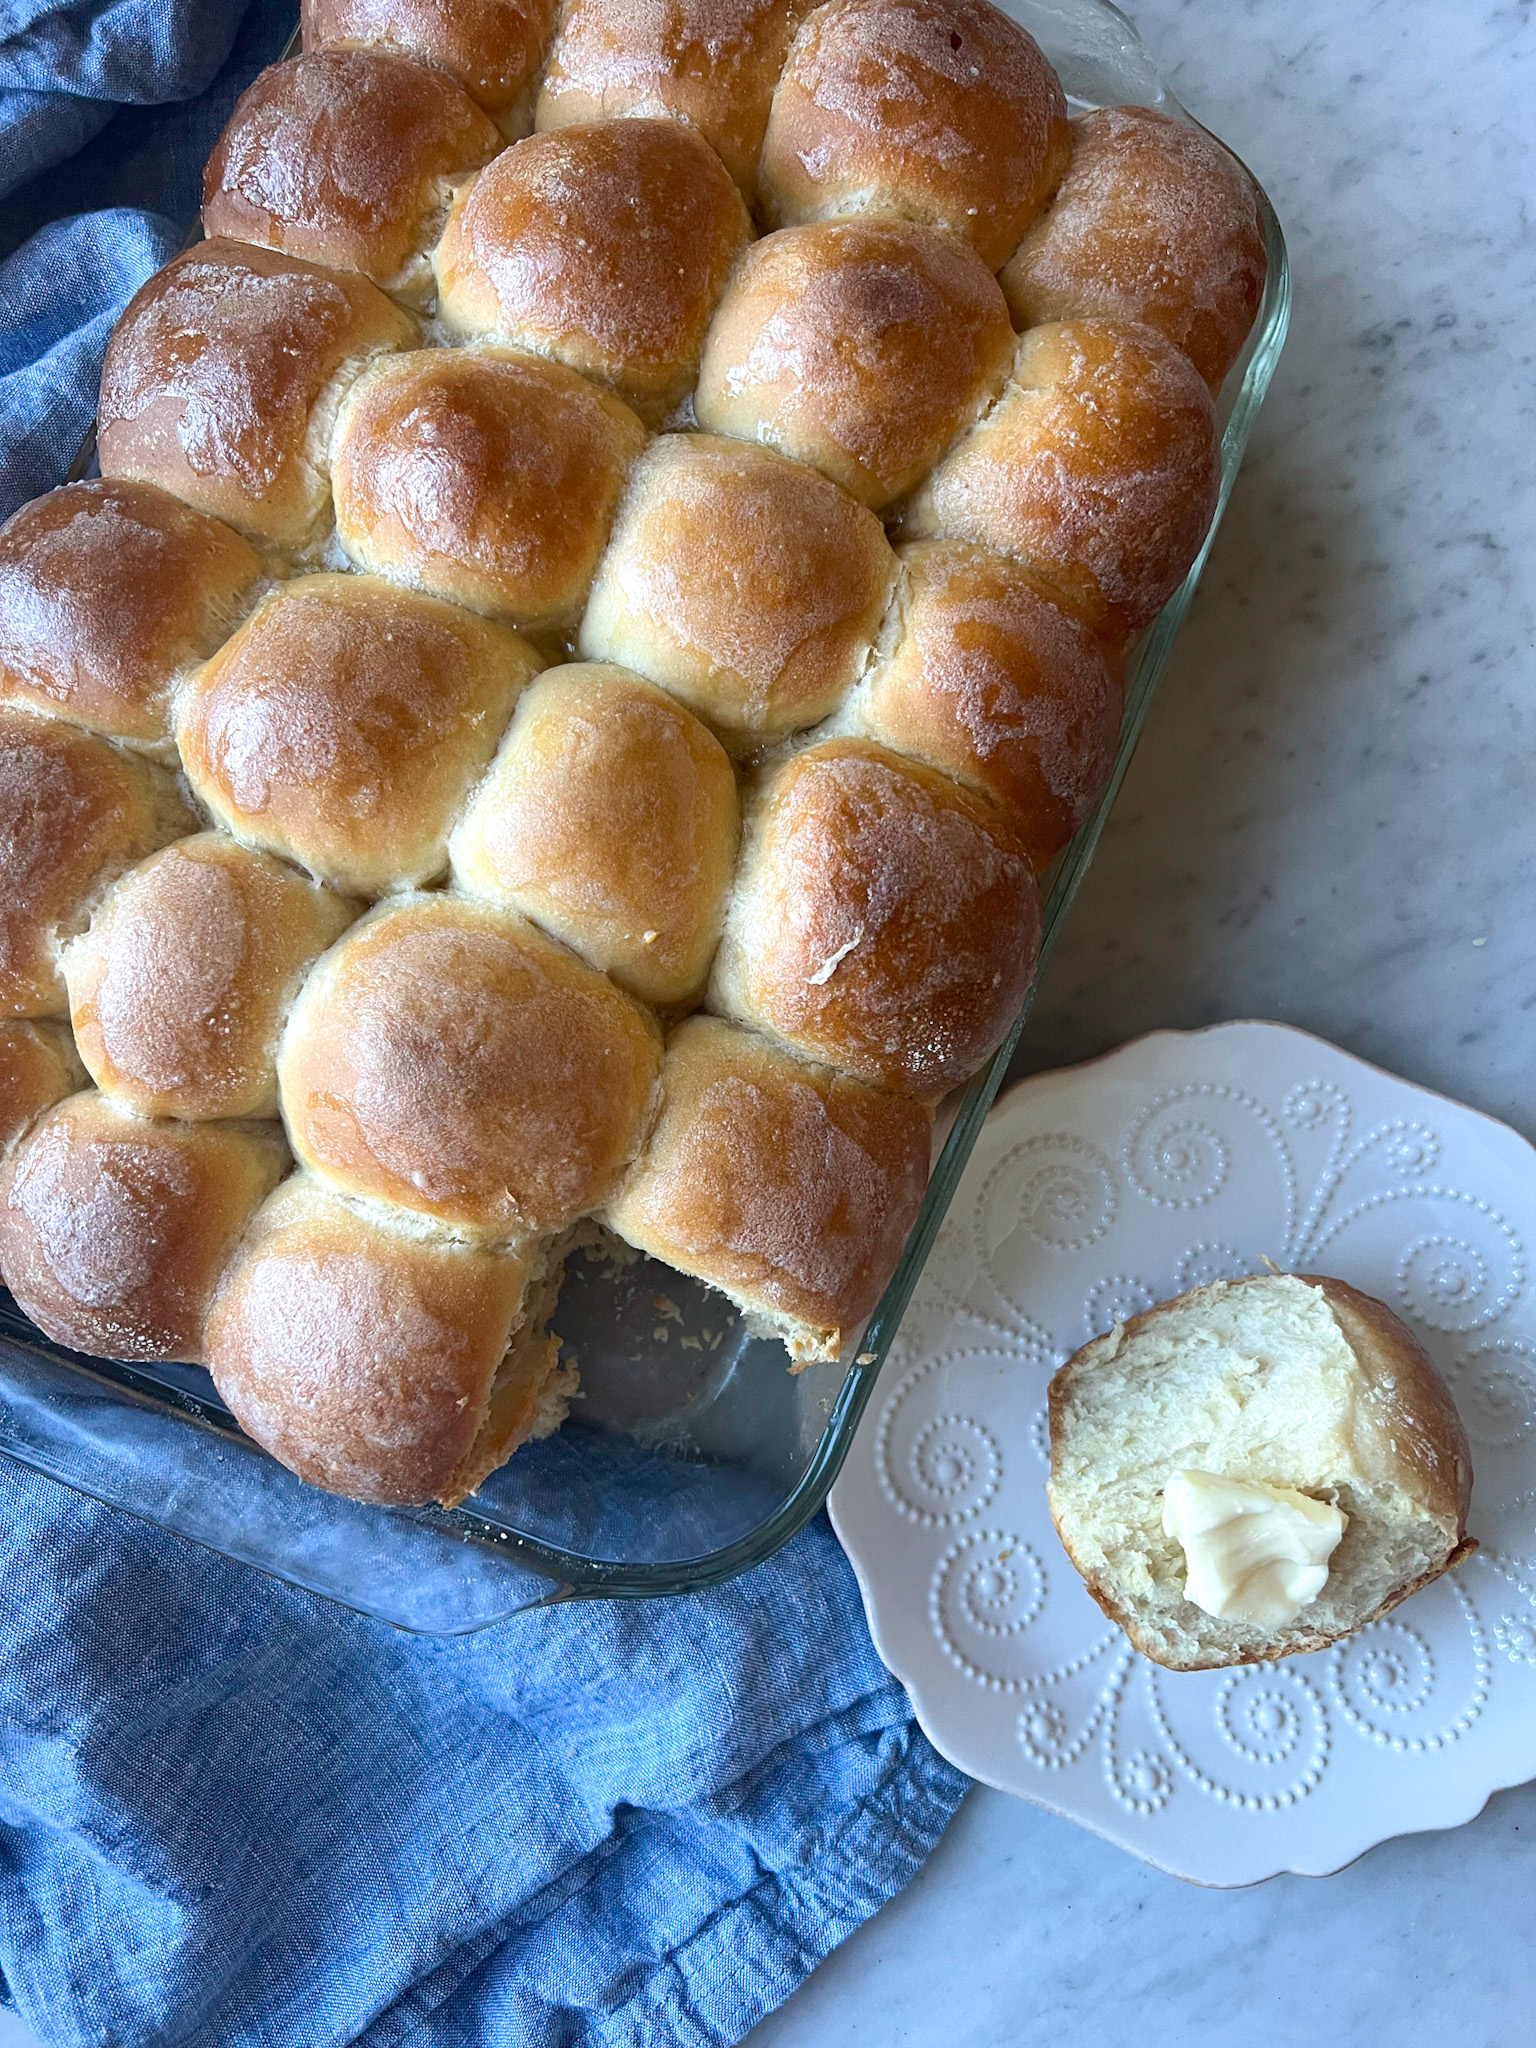
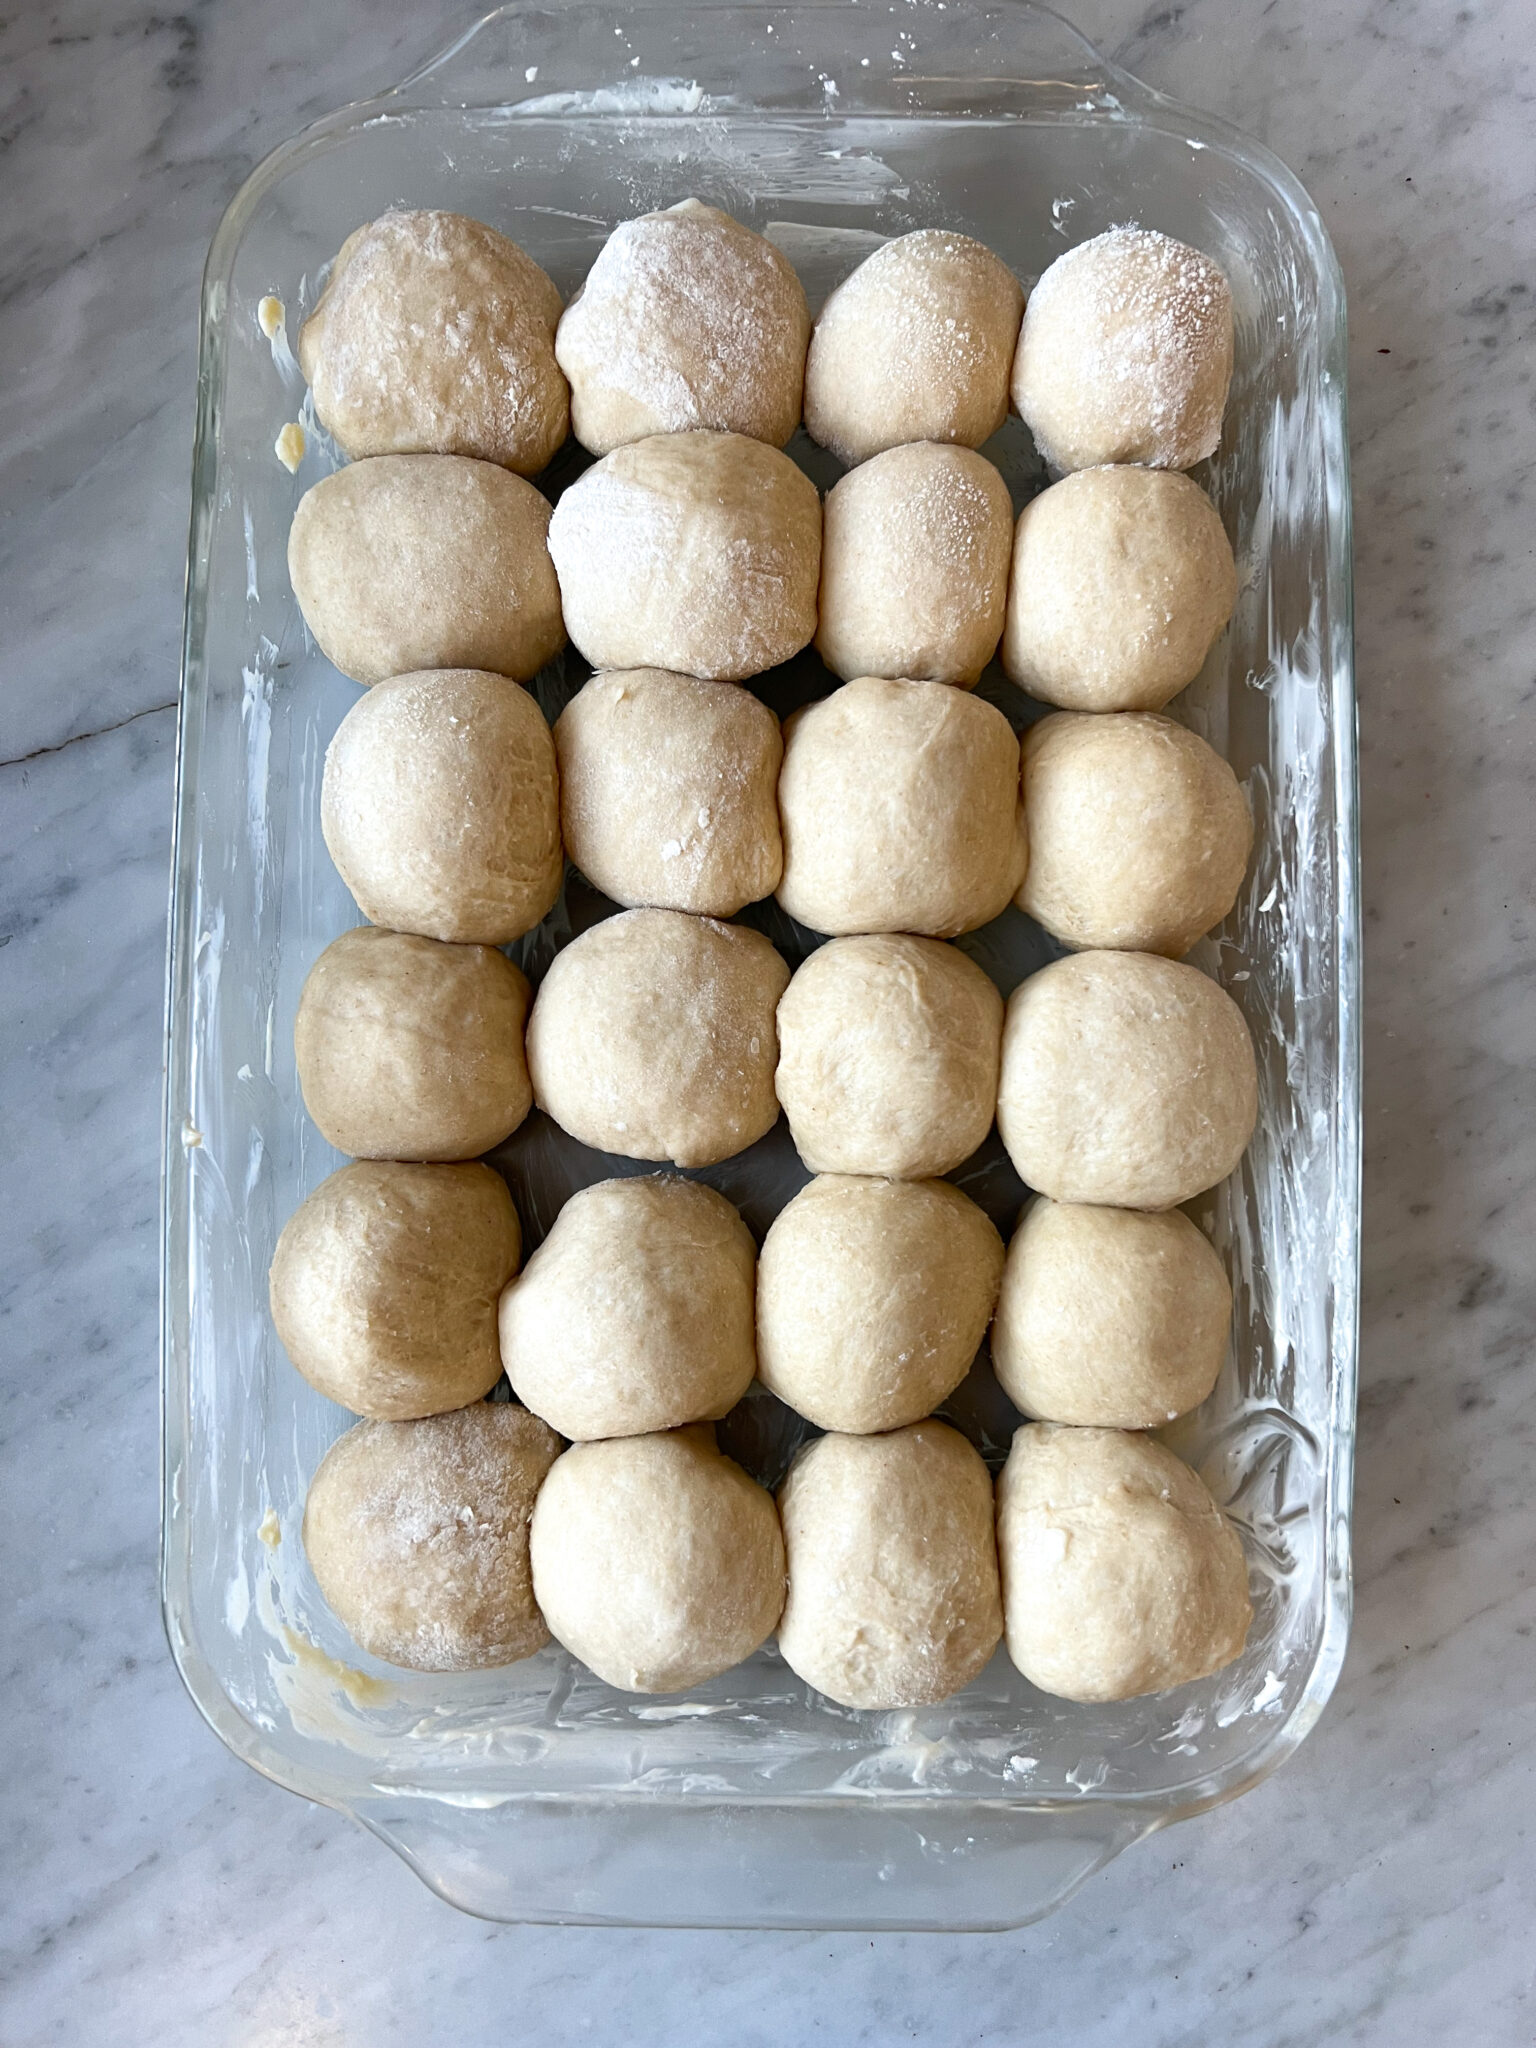
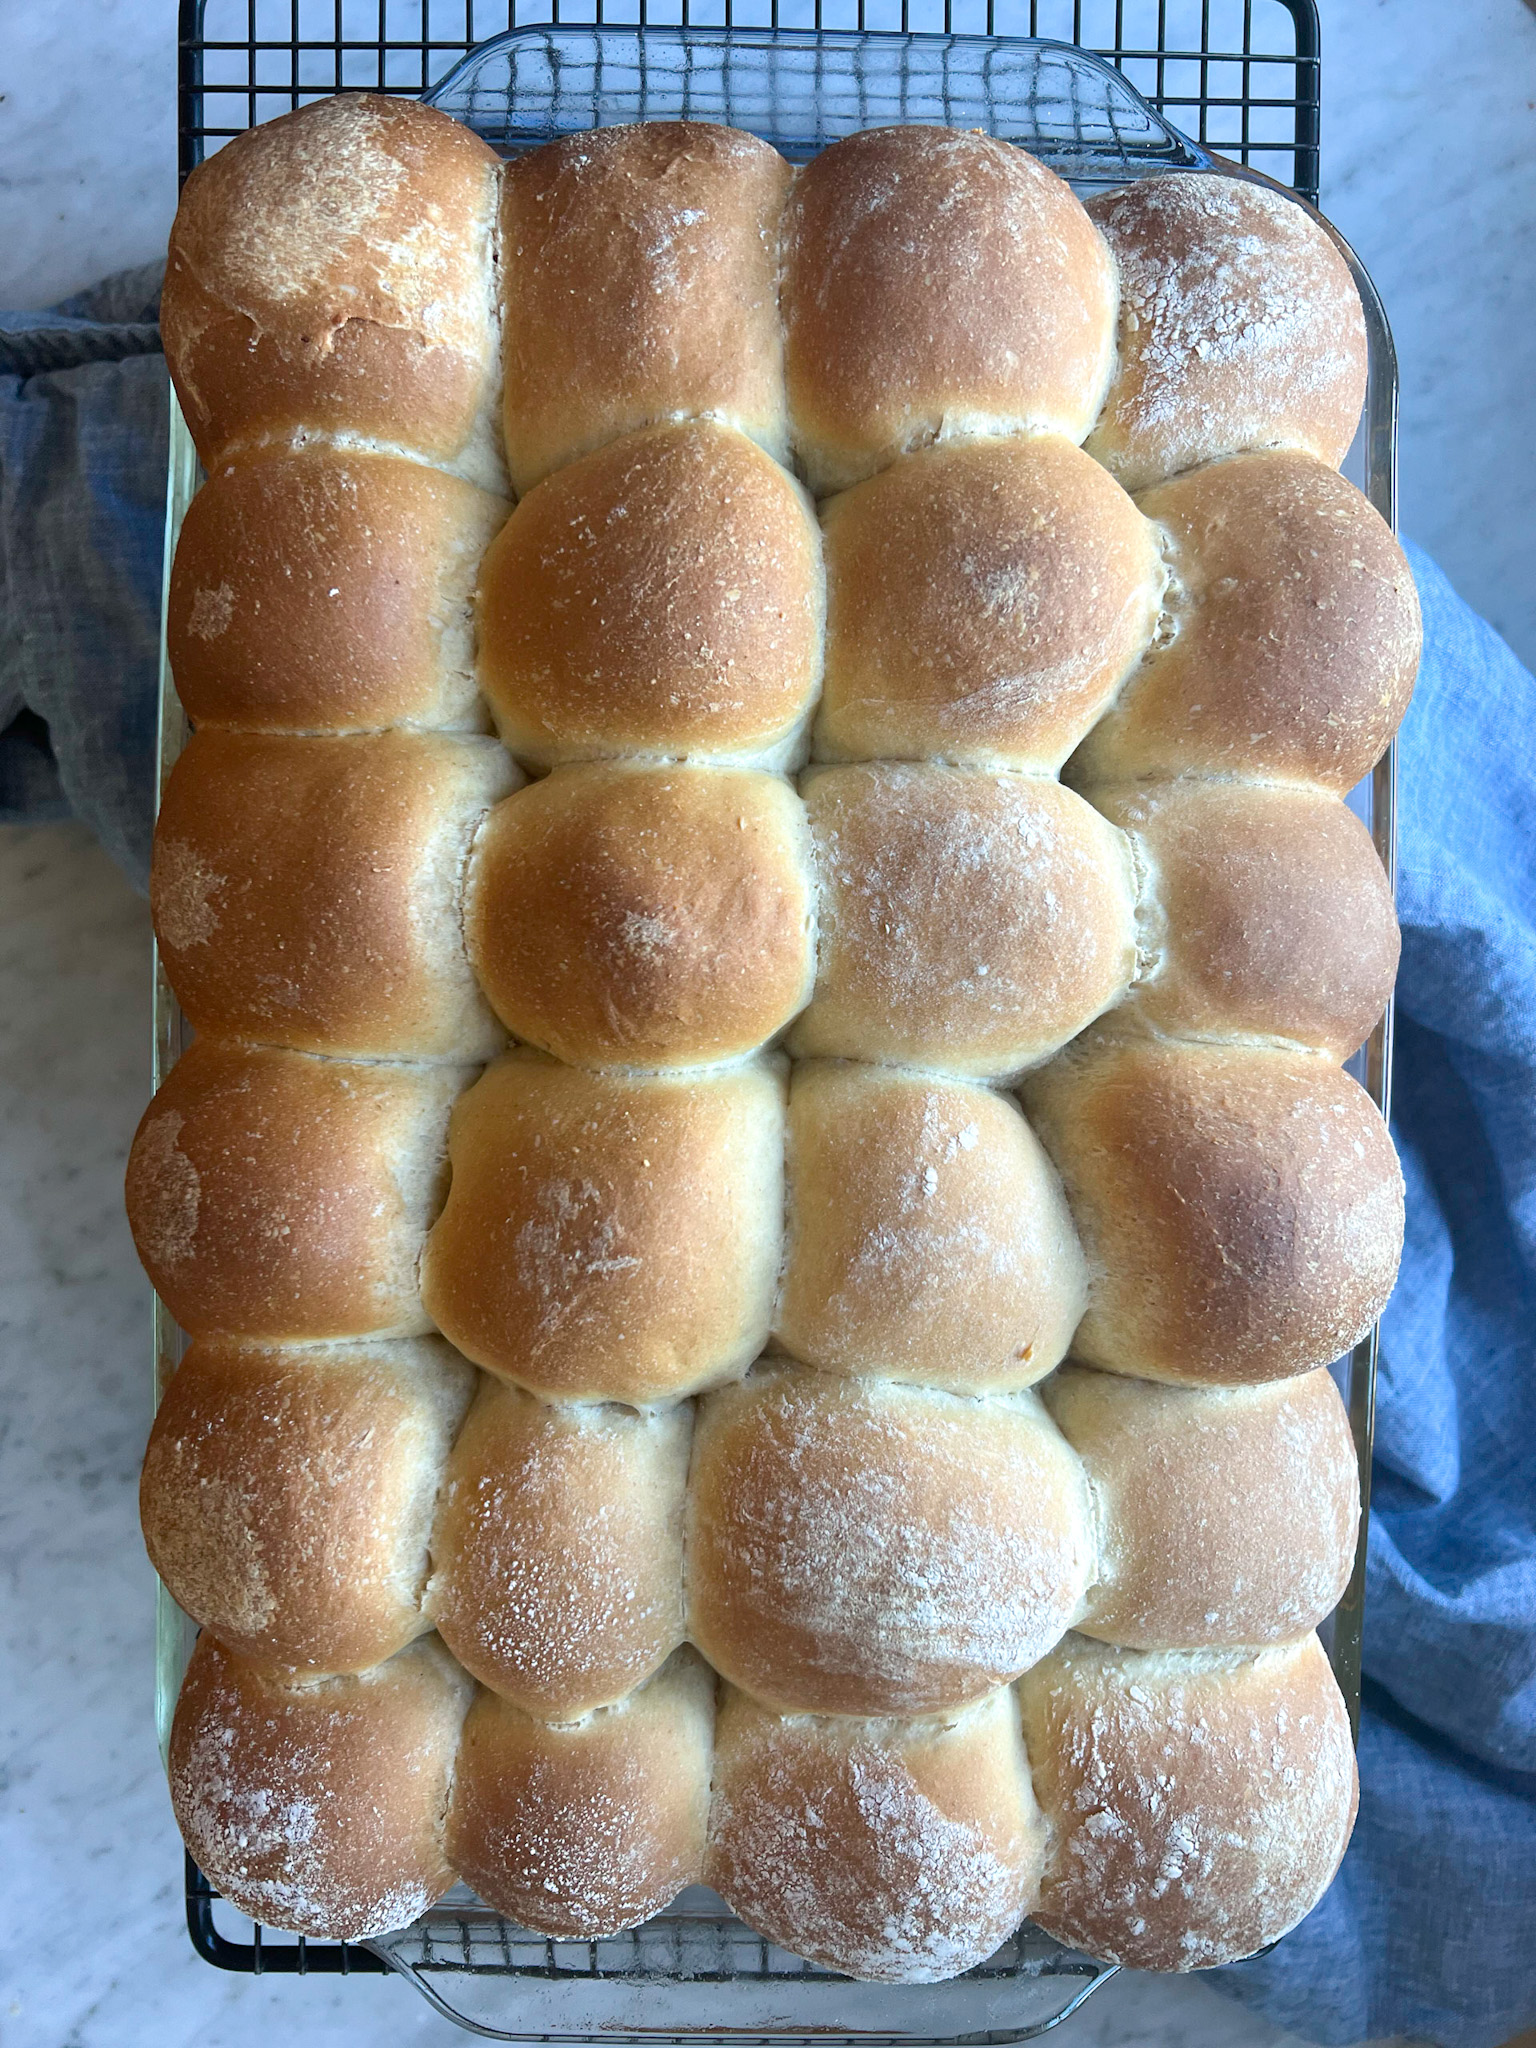
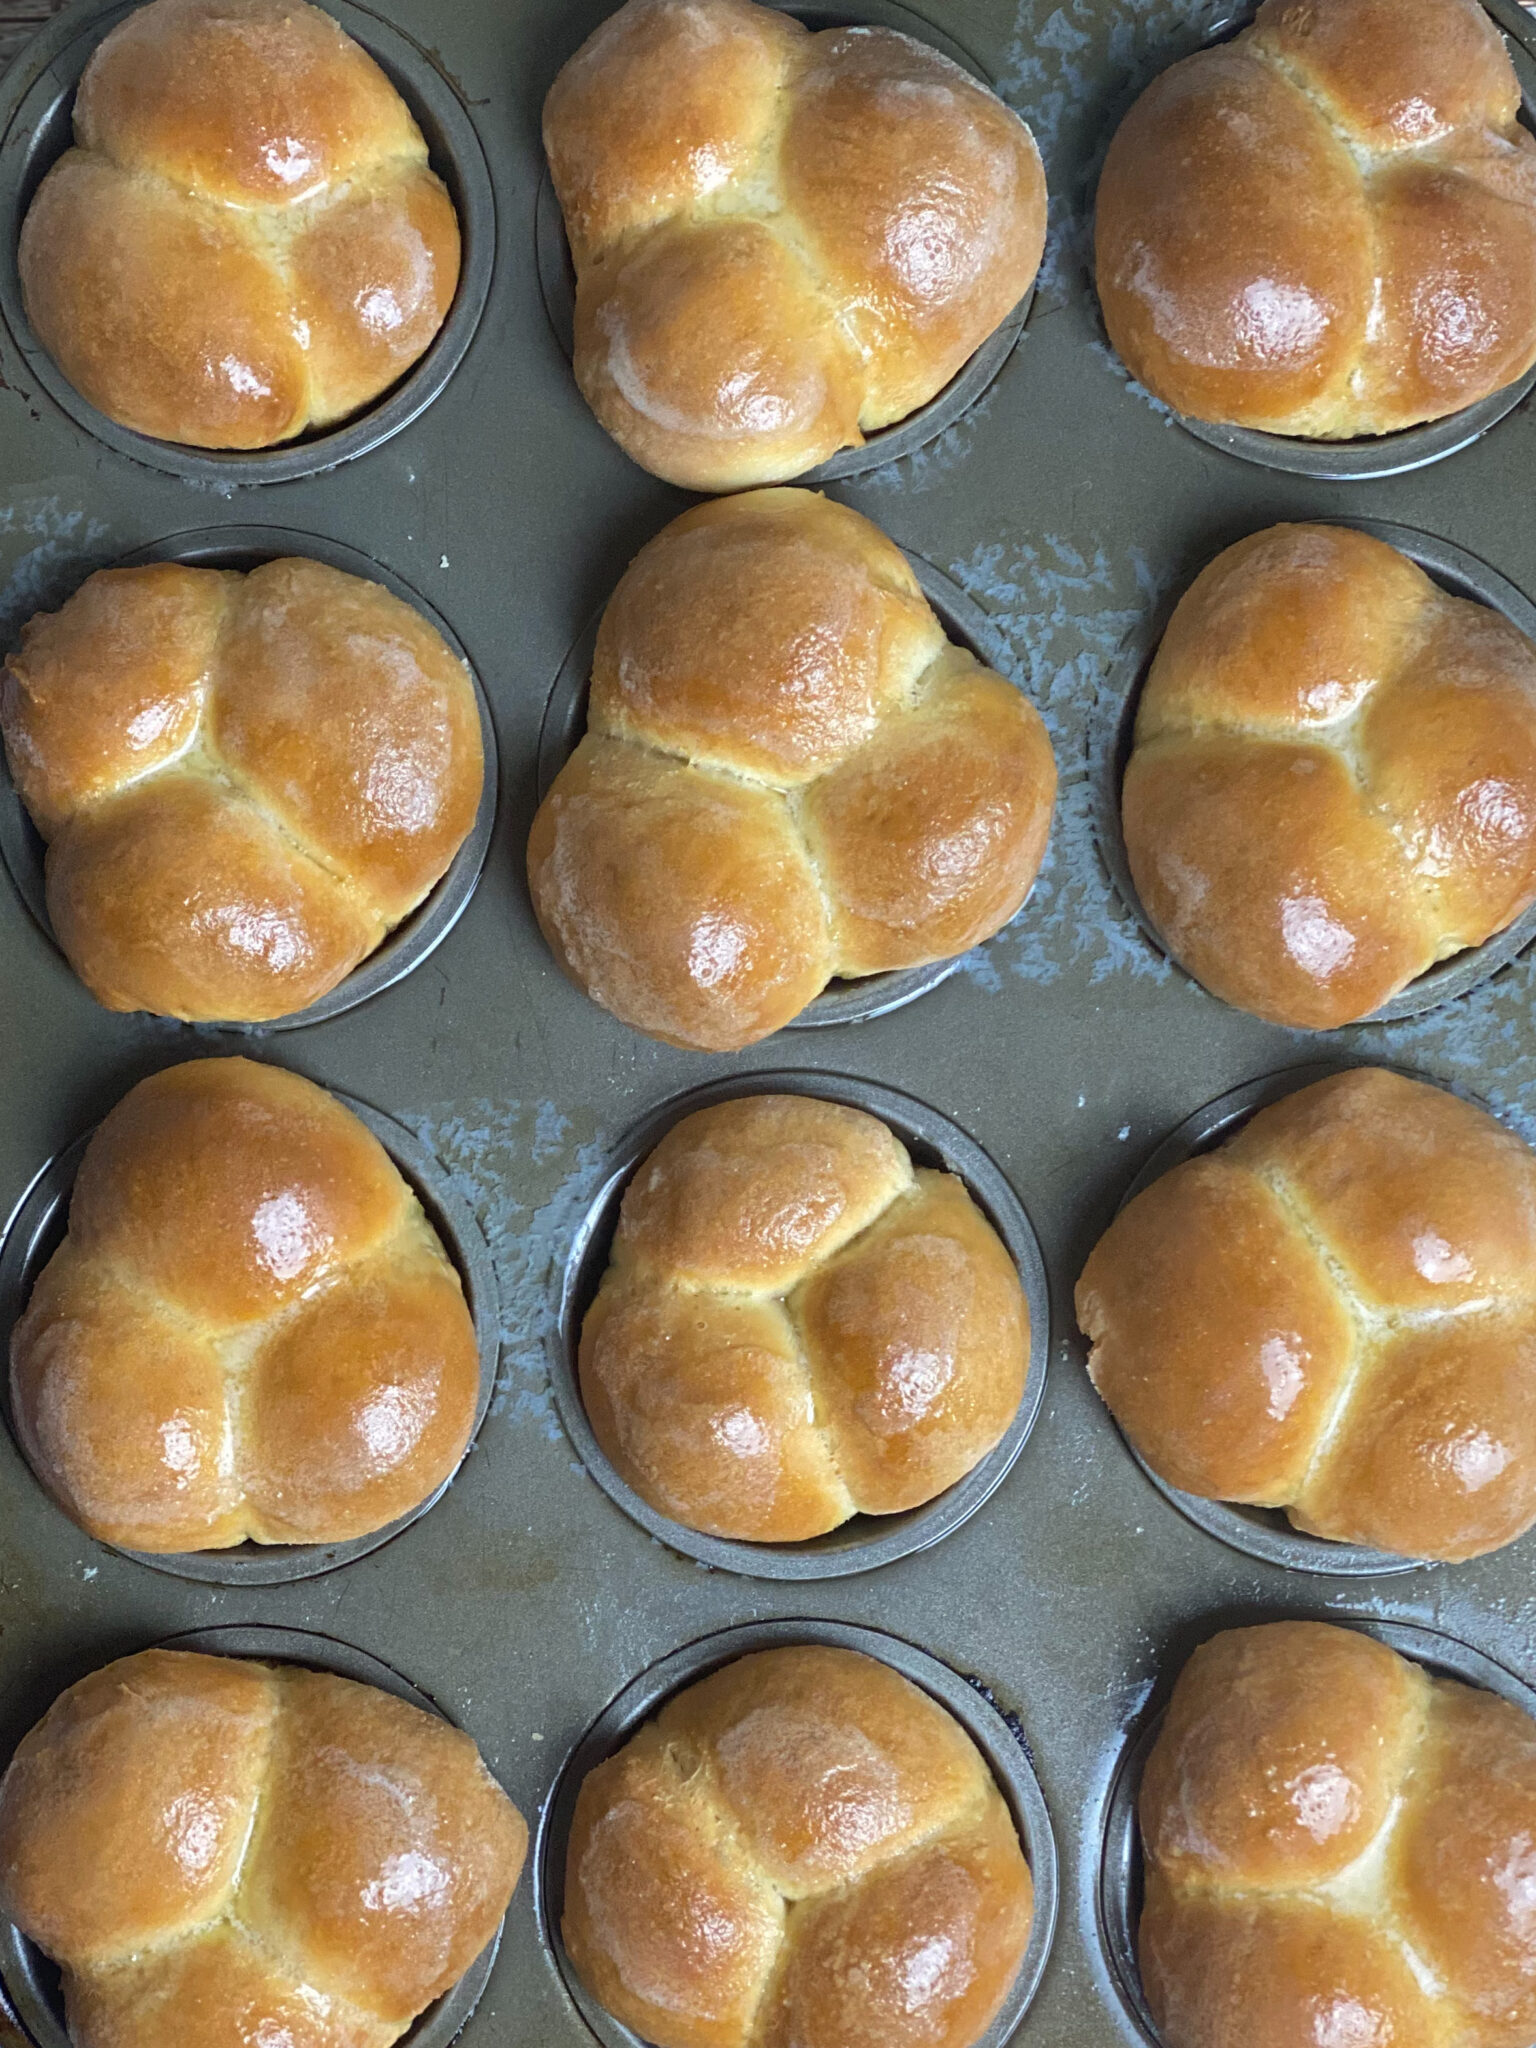
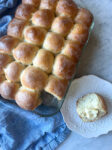
Shaping the dough is simple. Decide how many rolls you want and divide out the dough by cutting it into that many pieces.With this recipe, you can make 24 large rolls that you can bake up in one pan. You may also divide the dough balls out into smaller pieces and place 3 small balls into muffin tins to make clover leaf rolls. If you put all the rolls into a baking pan, they will bake with crunchy tops and tender and fluffy centers.
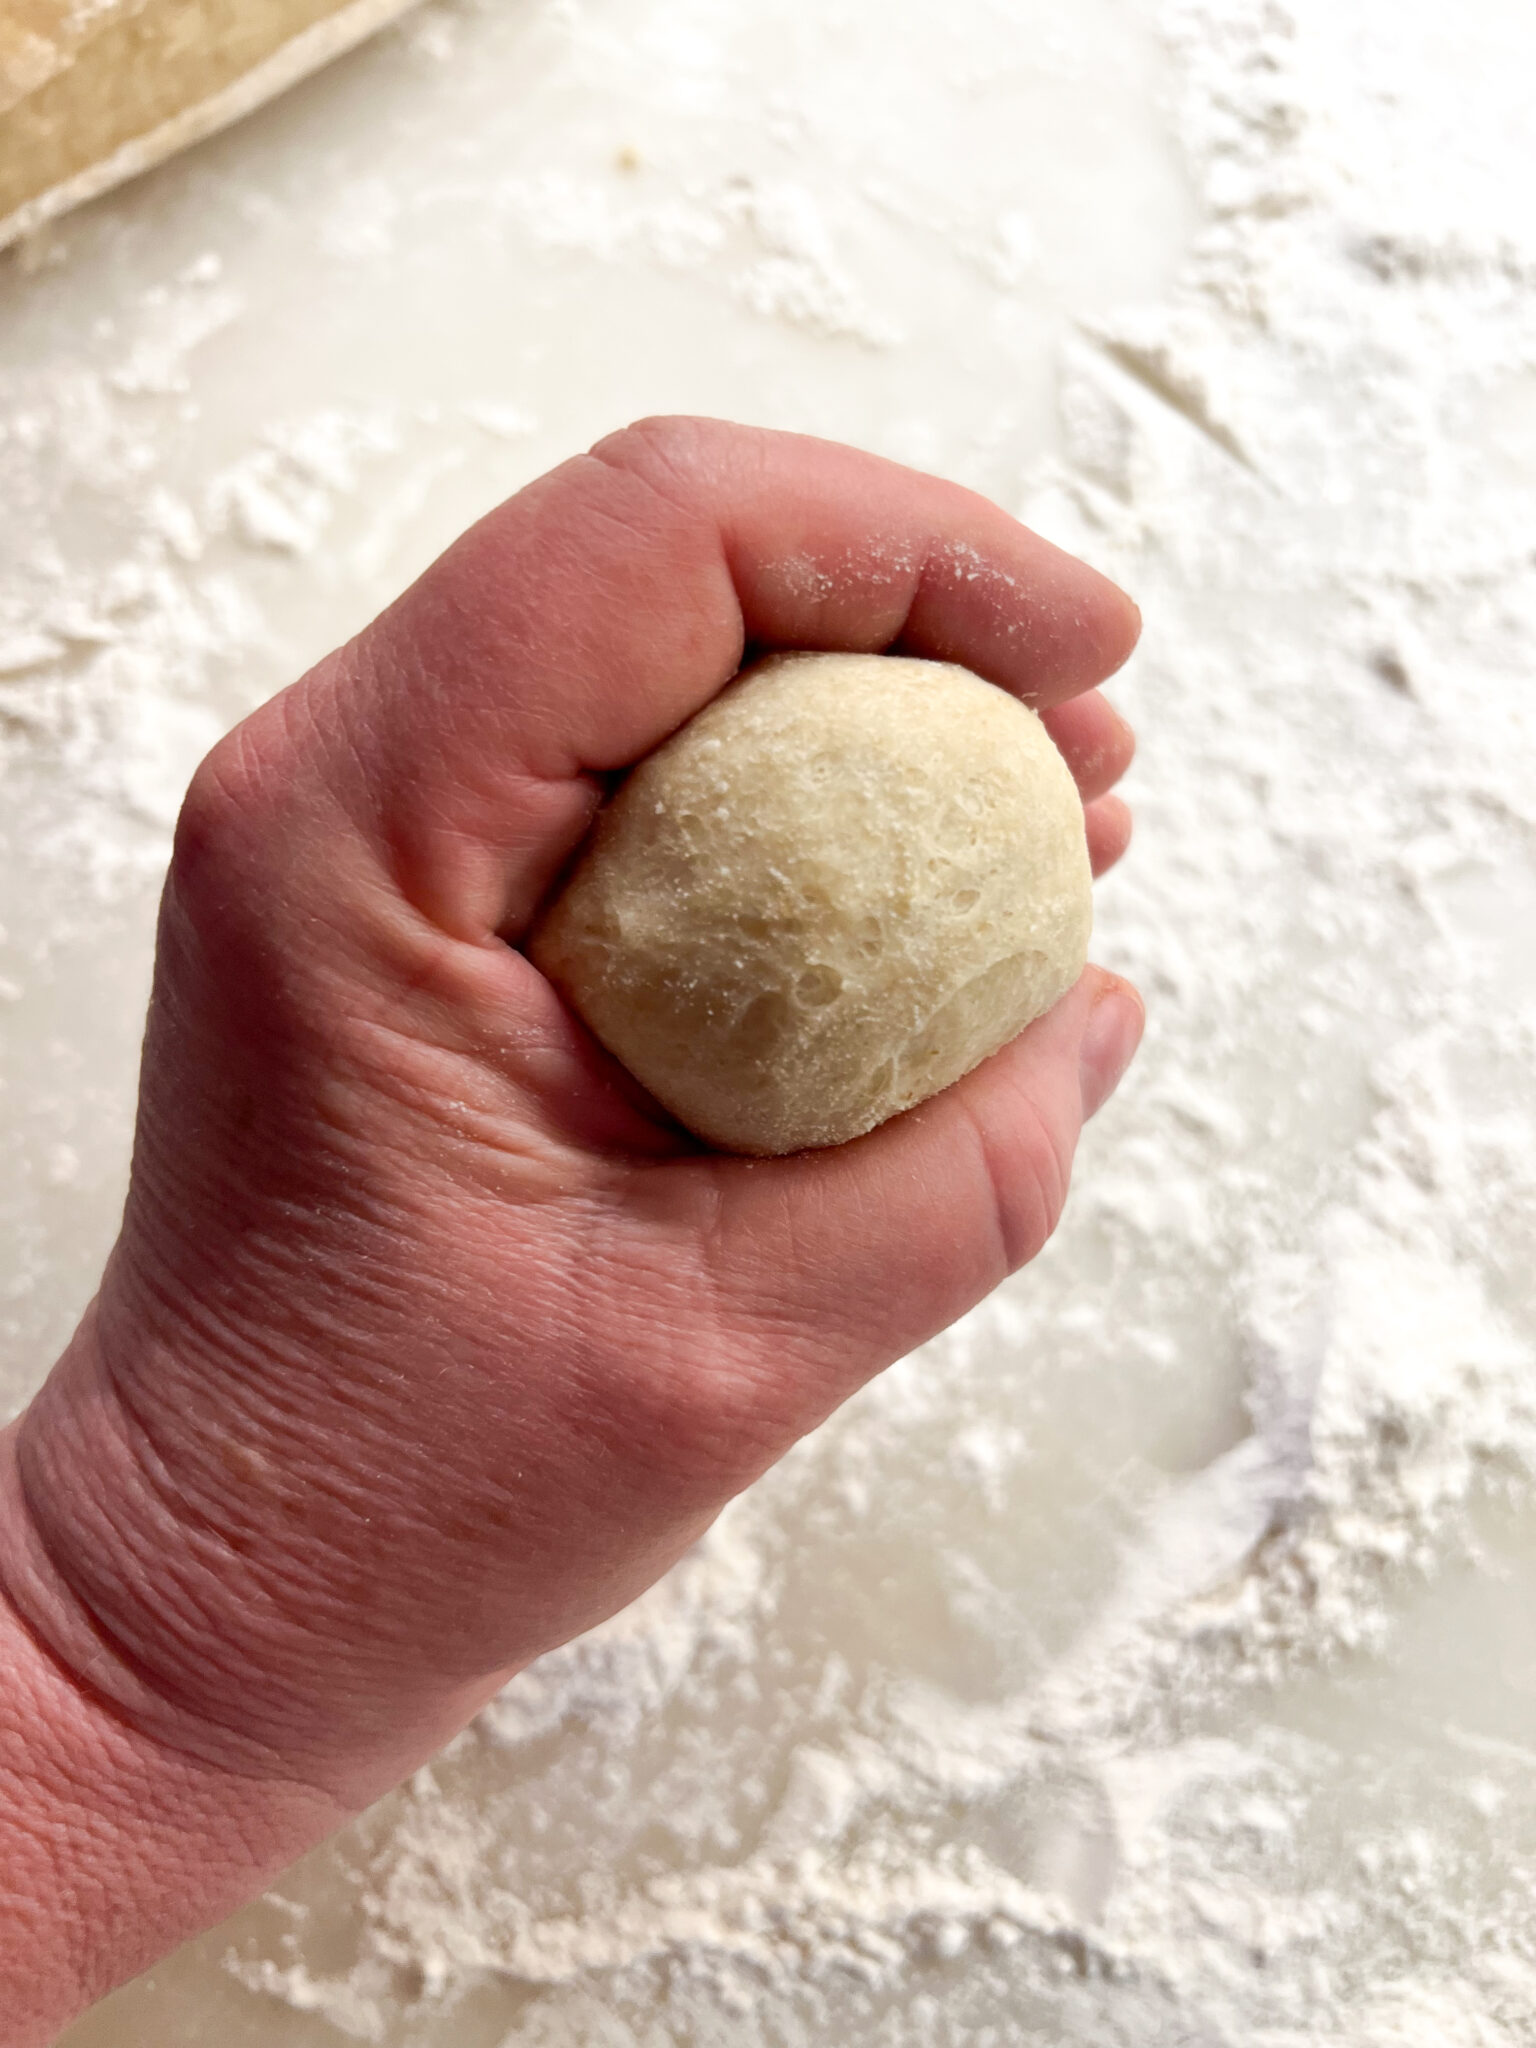
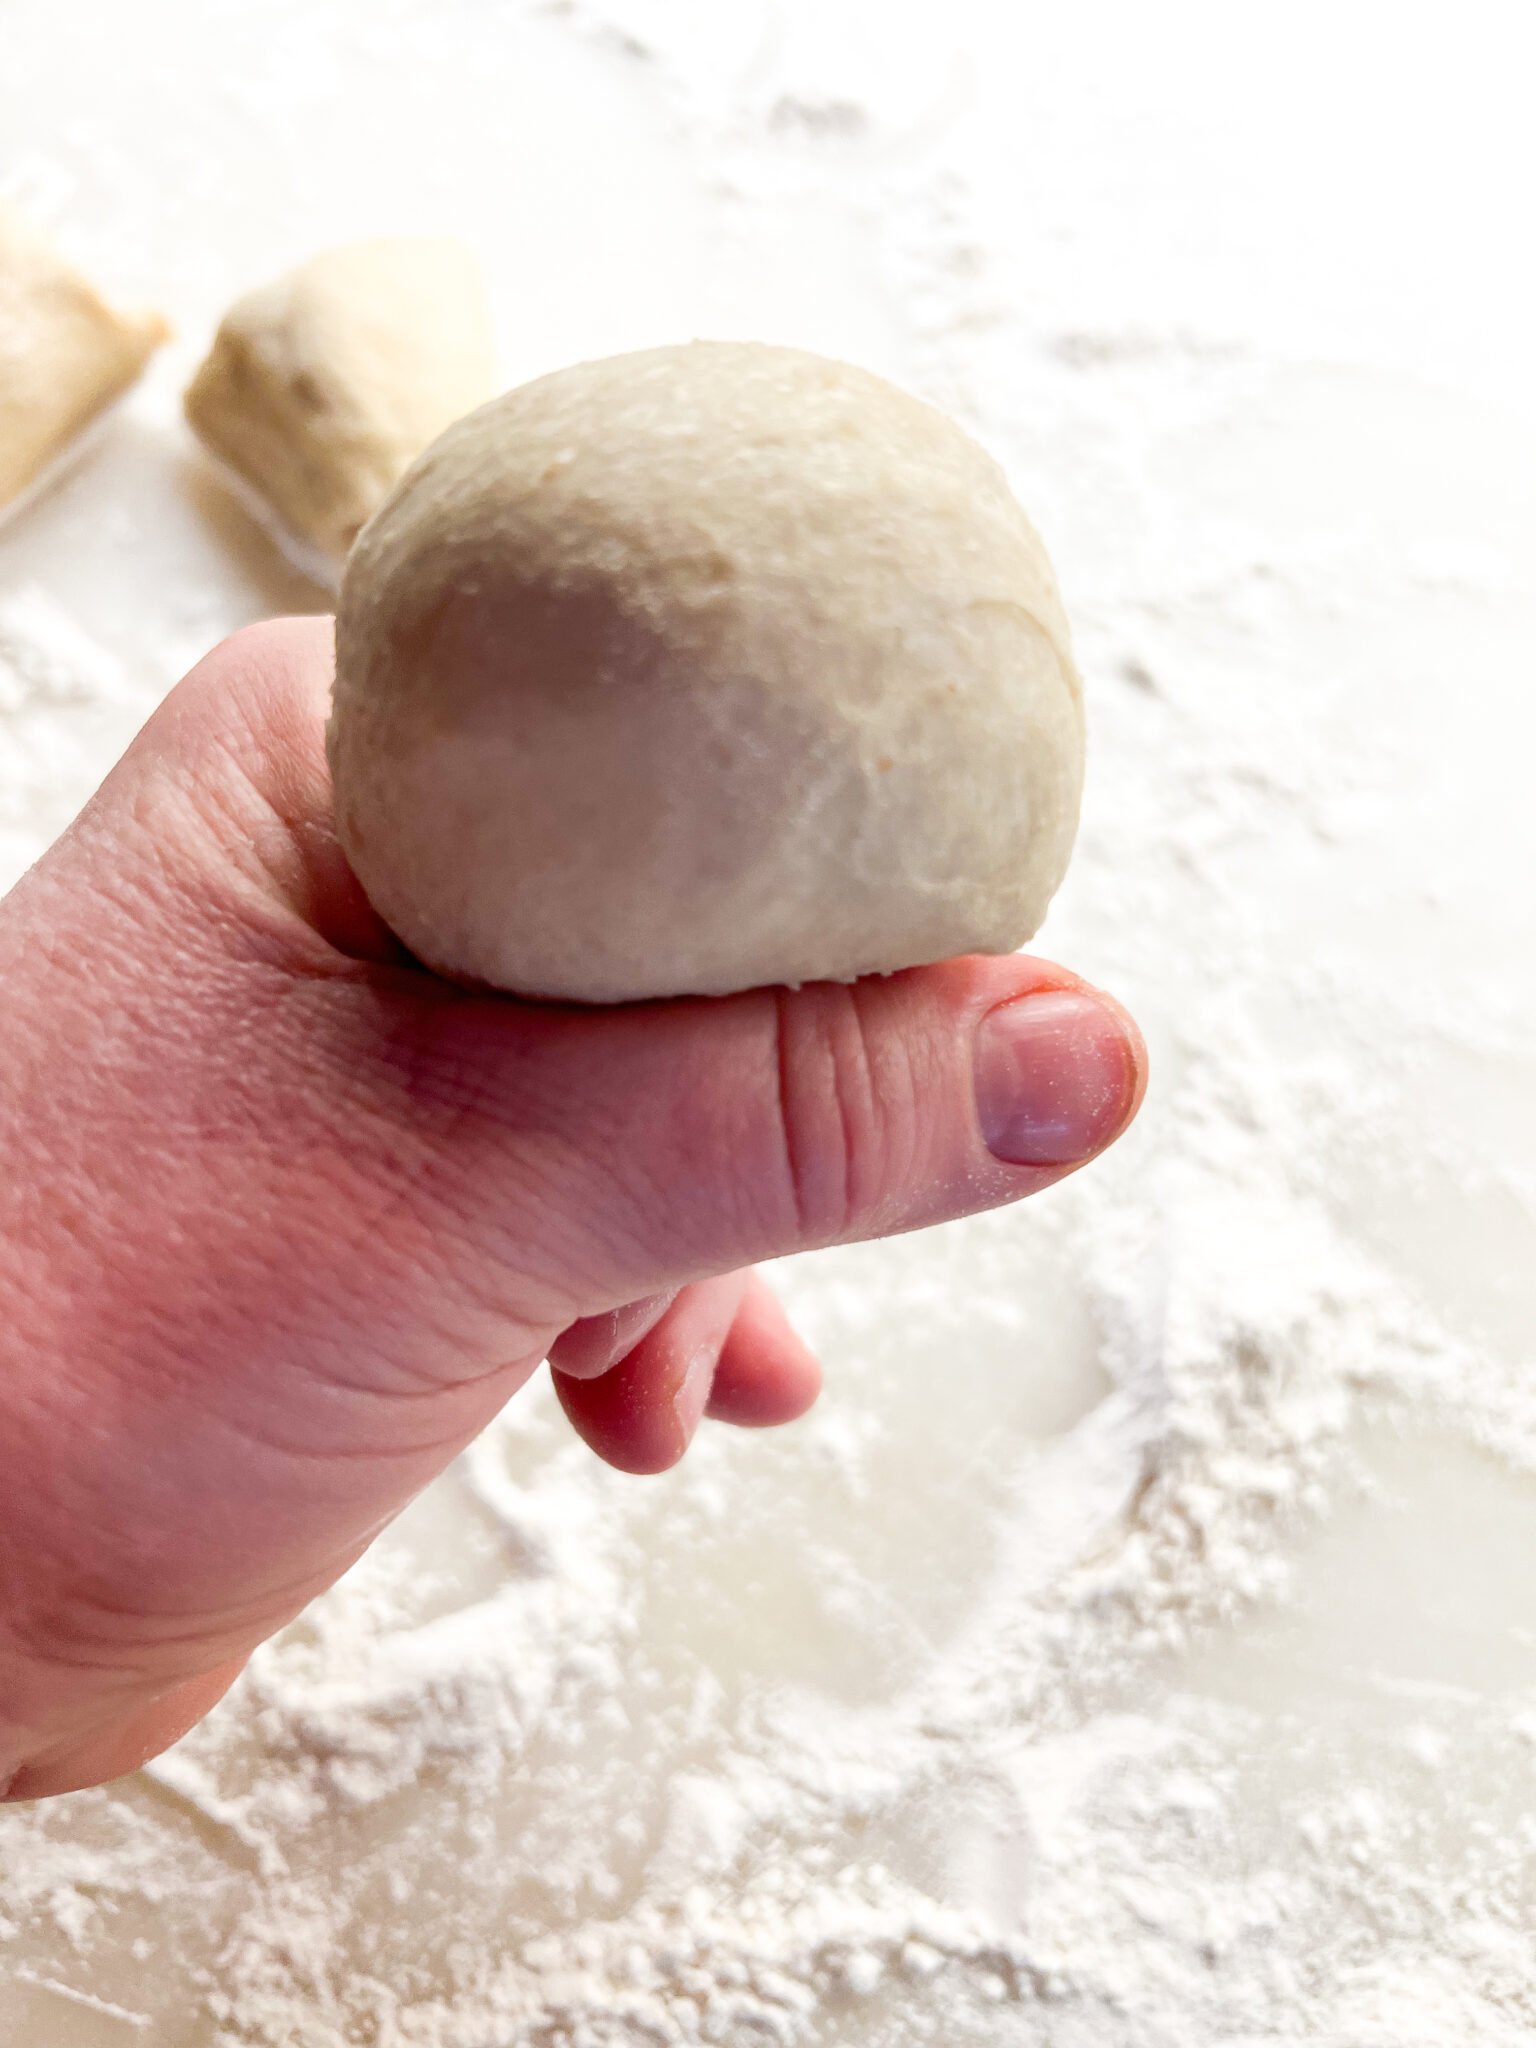
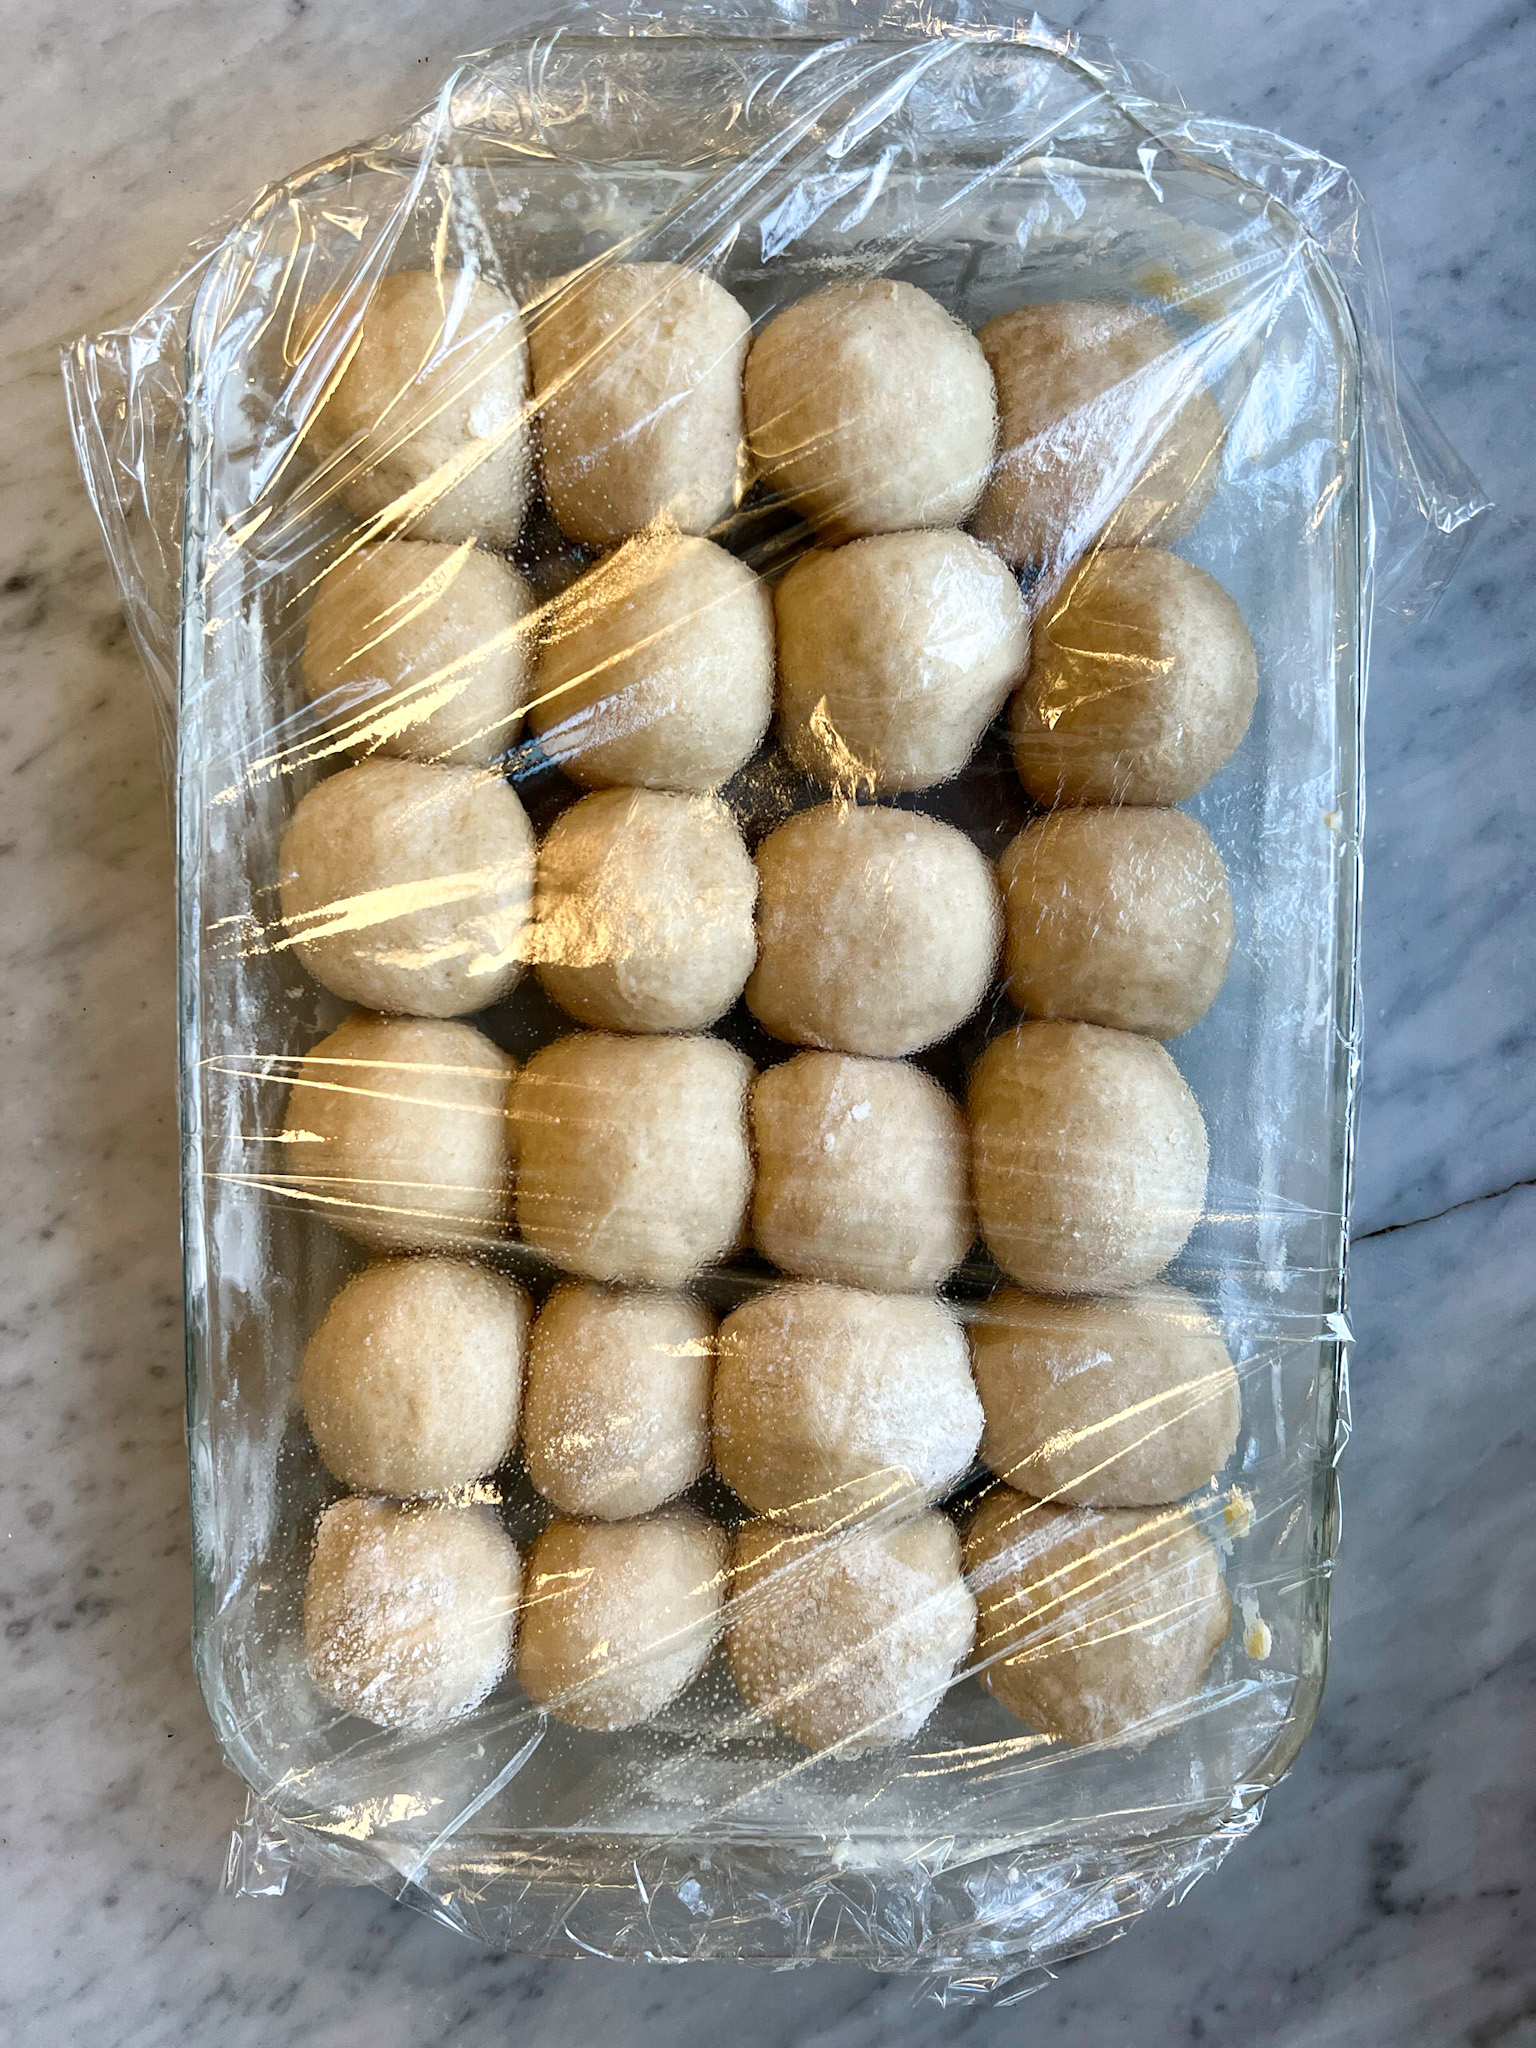
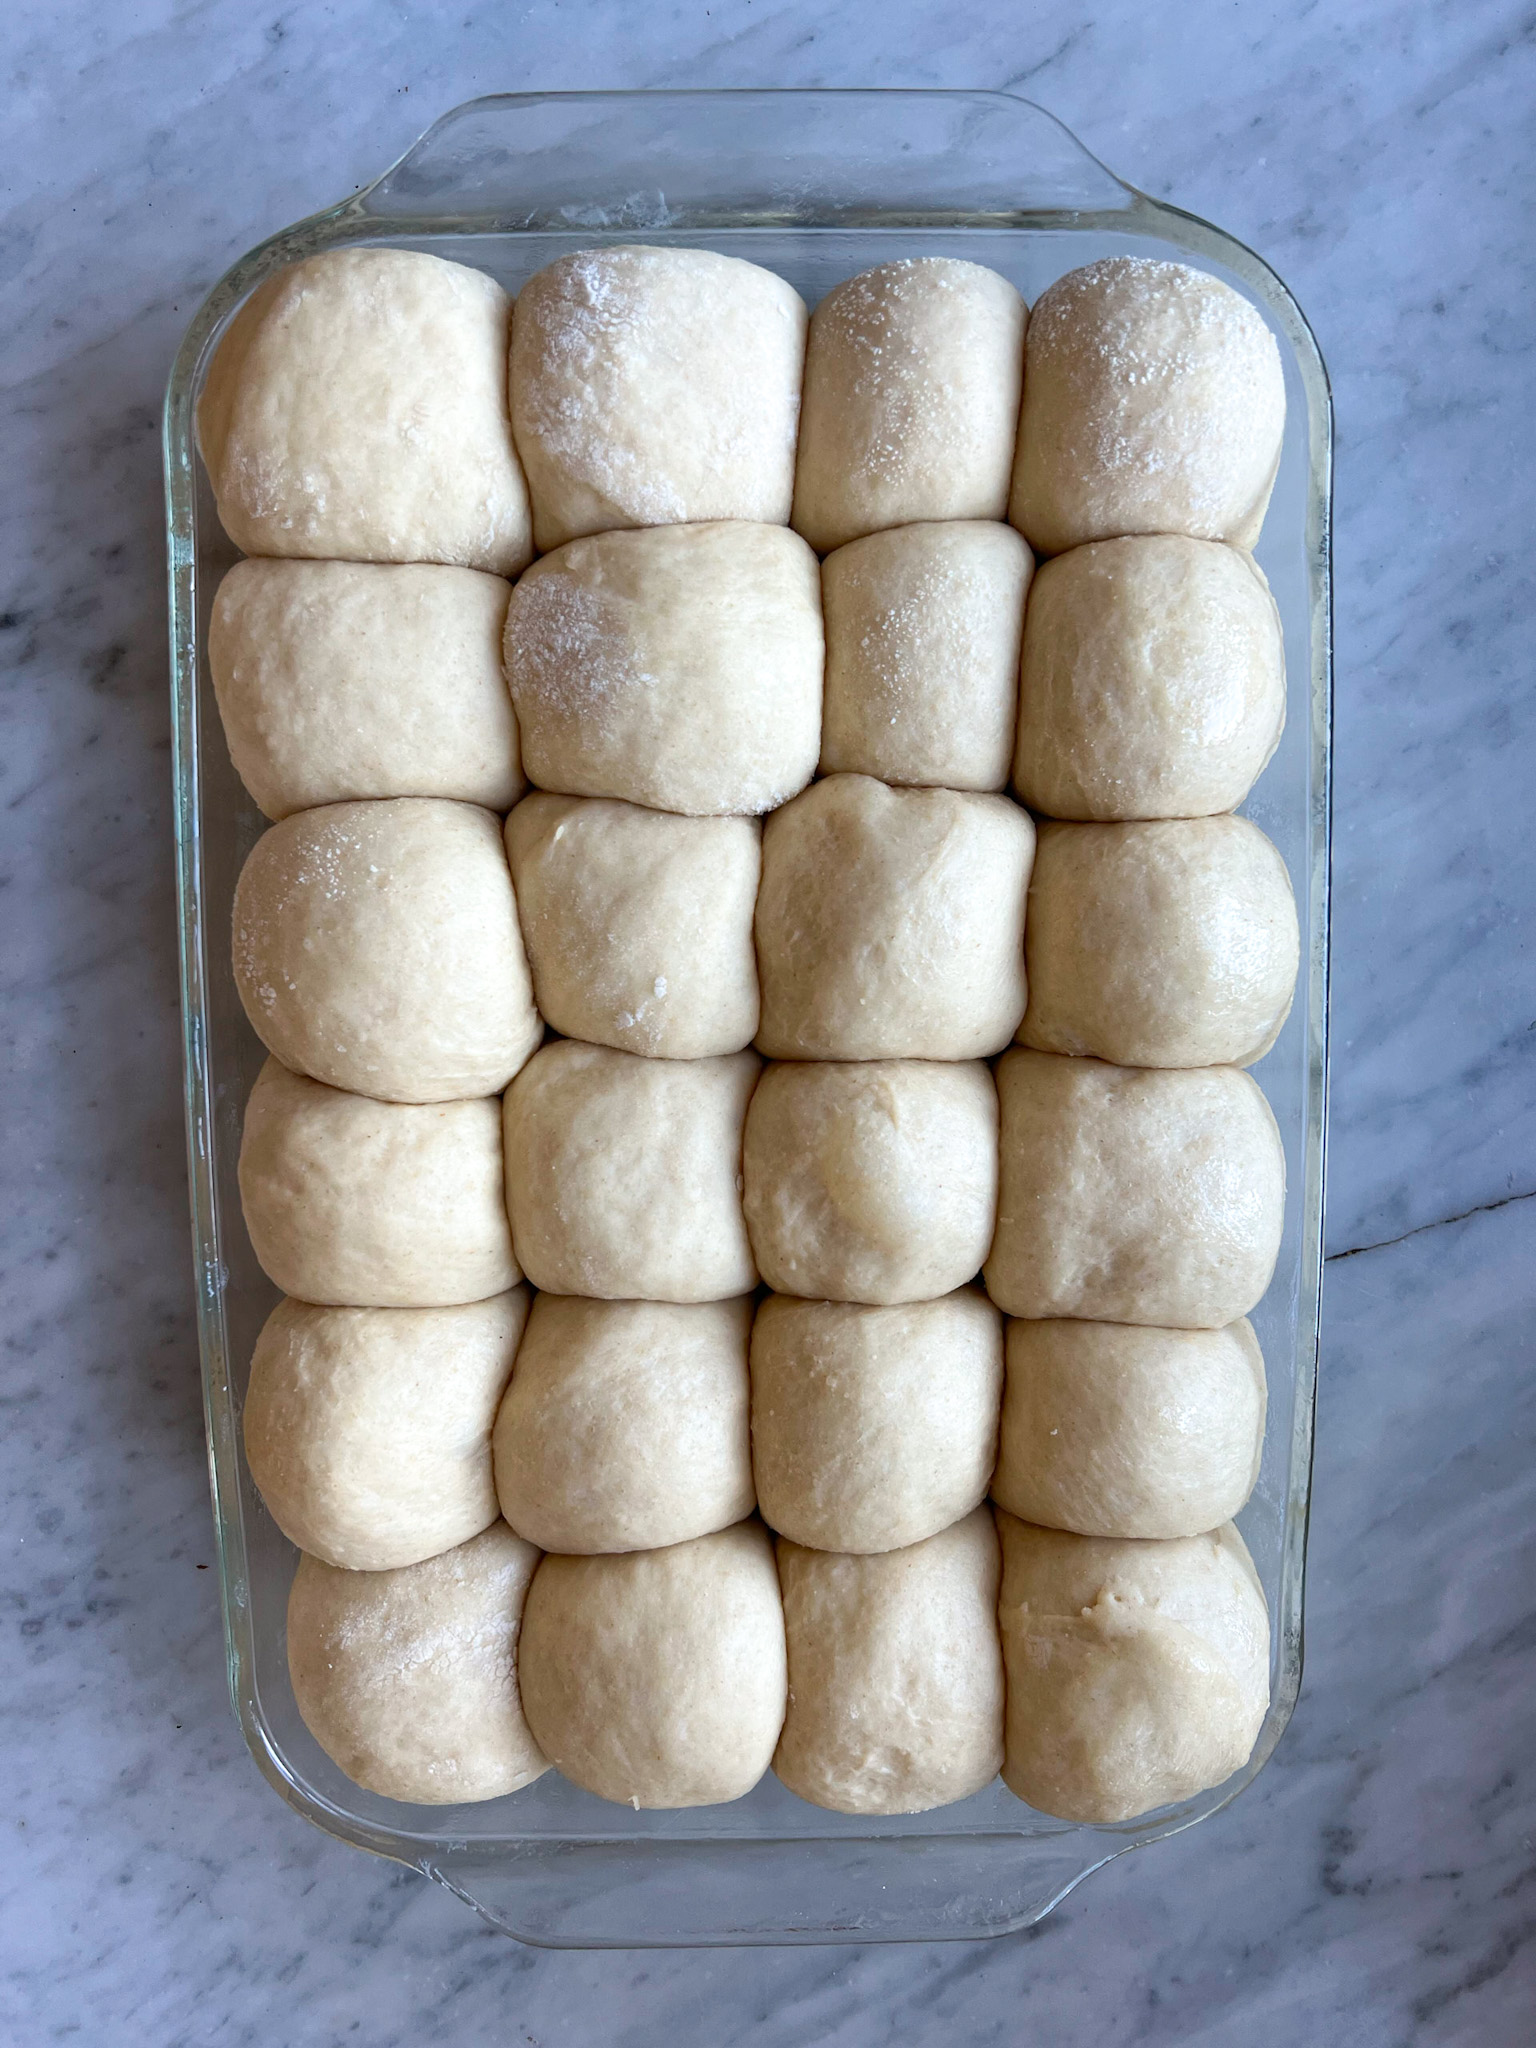
Pour out dough onto the floured surface. Using floured hands, pat dough out to be about the size of the pan you will be using. Use a bench scraper to cut the dough long ways into 2 halves. Now cut each of those long halves again longways. Now cut across the middle. Now cut those into 3 pieces. You will have 24 pieces. At this point, you can roll these into balls using a stretching method. Simply make an okay sign with your thumb and pointer finger, and push the dough through the okay hole. Using the pointer finger of your other hand, push the dough through. It kinda forms a little balloon! Now place that twisted side down into the corner of the buttered pan, and repeat with all. Cover the rolls with plastic wrap that has been lightly sprayed with oil. These make pretty big rolls, so you can also use a bigger pan, or 2 pans, and make smaller rolls.
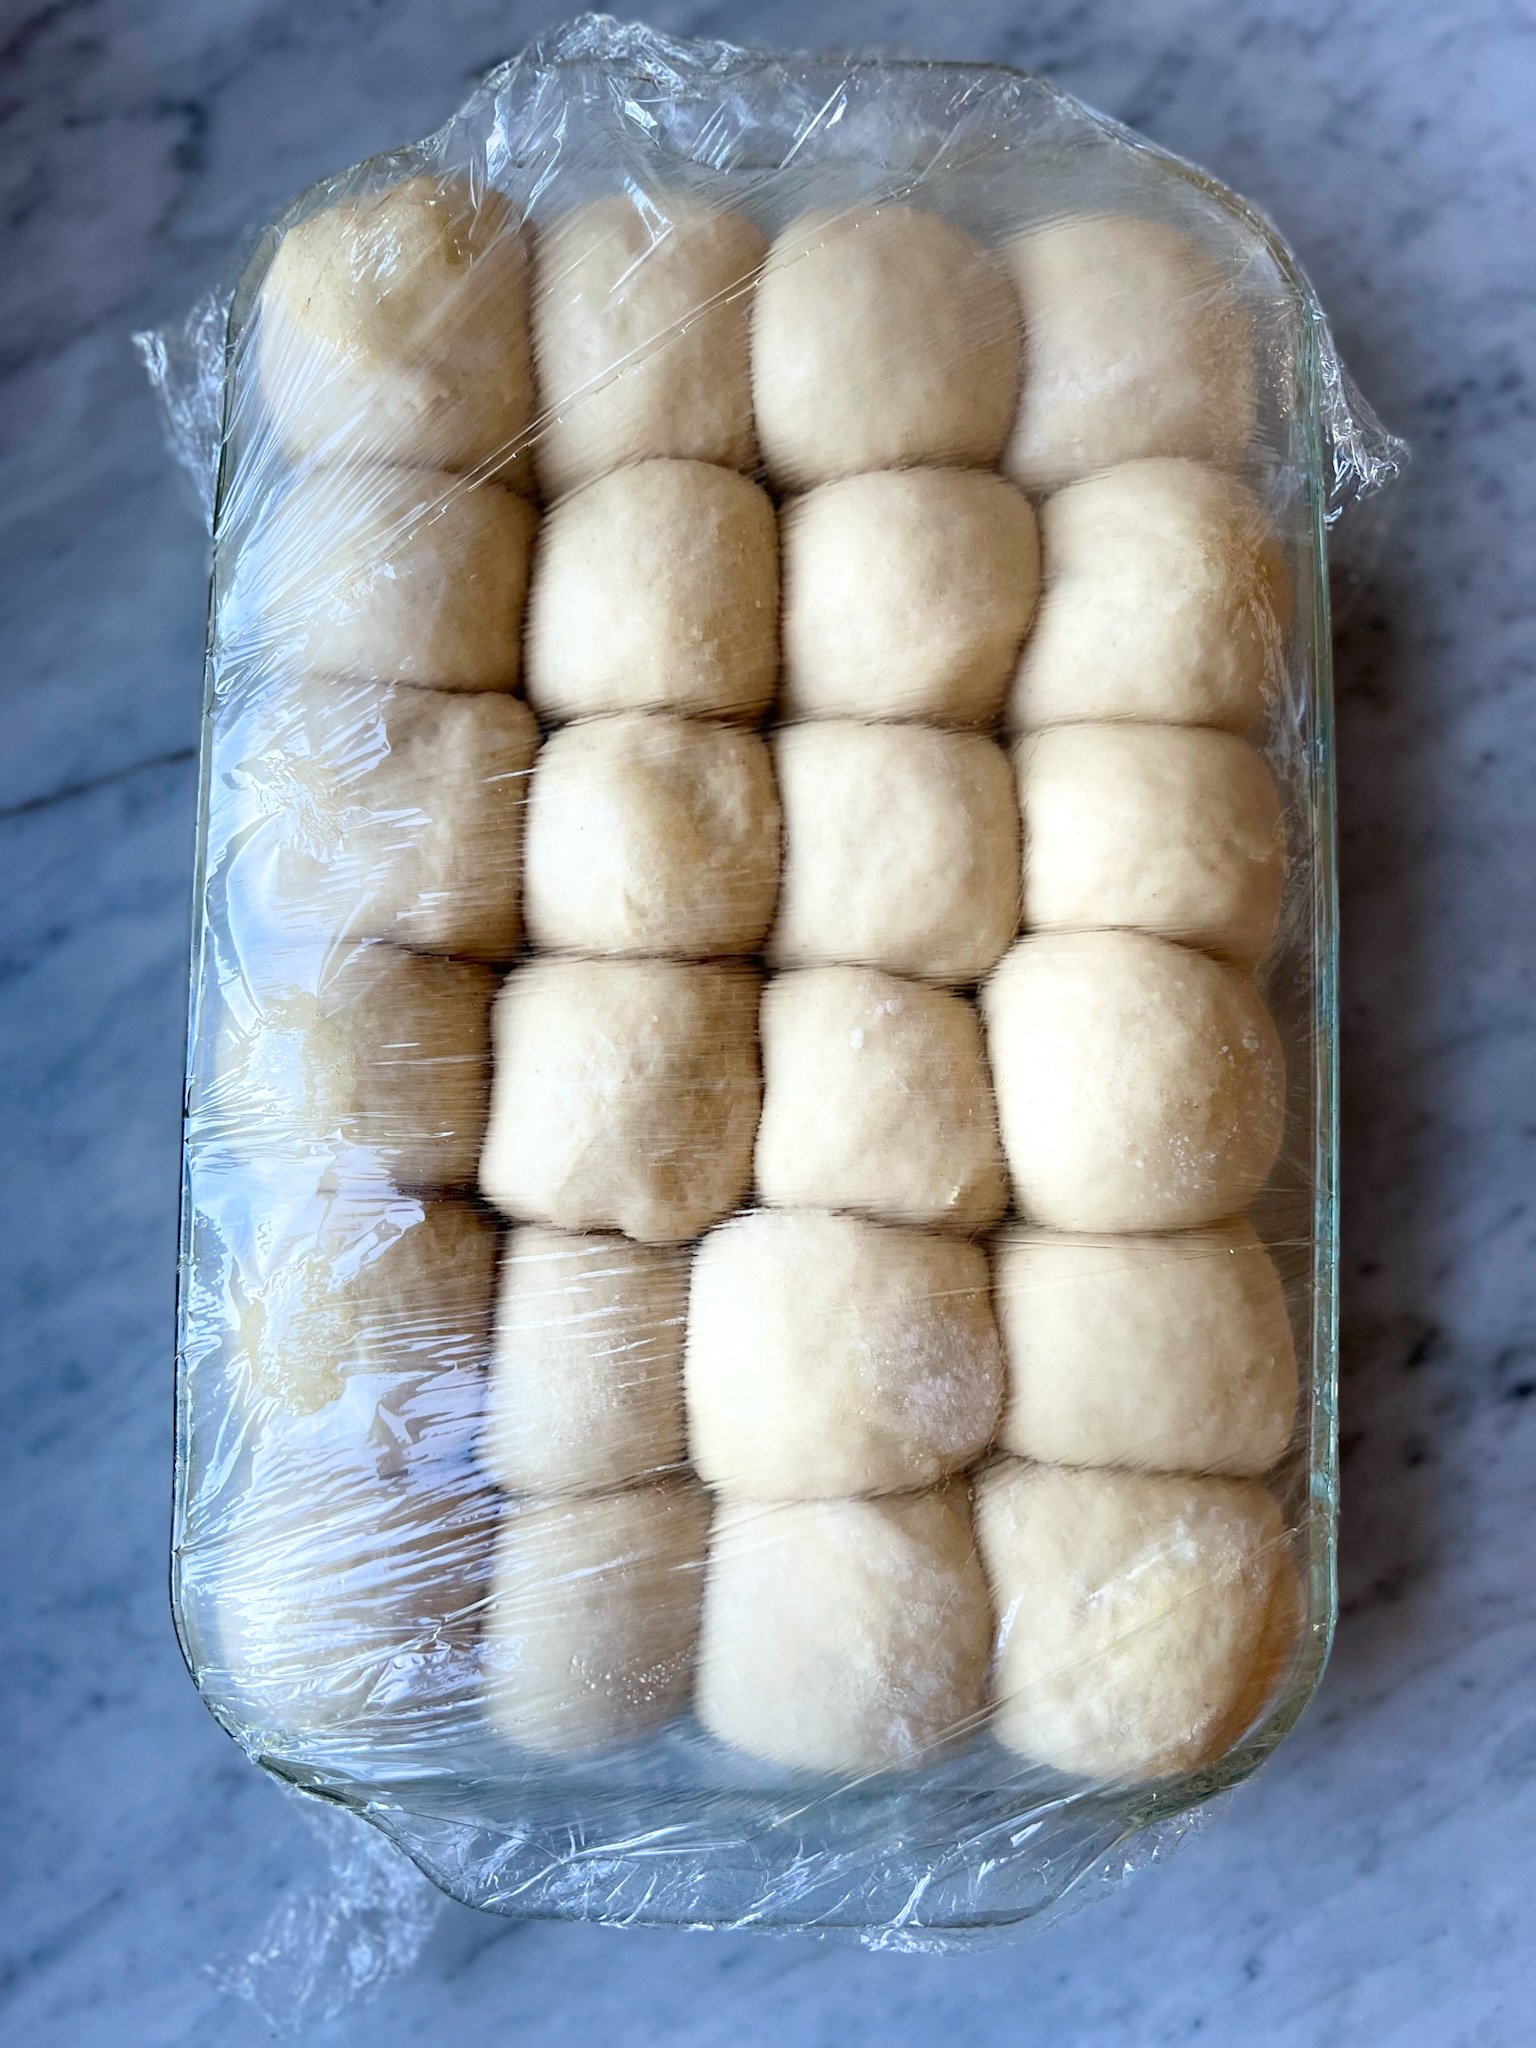
Step 4 (Second Proving)
Prove the dough for a second time. This will take another hour, depending on how warm your kitchen is. The dough should double in size, so use your judgement to decide when it’s ready to be baked.
If you are cooking these in an oven with no proofing basket/dough frames, simply put them somewhere warm—like under light bulbs inside your oven, or on top of a dryer that is on. It’s important that they don’t get too hot though—80-90°F / 26-32°C is ideal—and make sure they’re still covered with plastic wrap while proofing here as well since air flow is necessary for proper gluten development.
Step 5 (Bake)
Preheat the oven to 350°F.
Pop the rolls into the hot oven and bake for 35 minutes, or until golden brown on top. To check for doneness, insert a digital thermometer and look for an internal temperature of 185-190F. If rolls begin to brown, but are not yet done, loosely cover with a sheet of foil for remainder of cooking.
Step 6 (Gloss with Butter)
Once the rolls are pulled out of the oven, you will want to rub them with butter to give them that glossy and delicious look. This will not only make them look amazing, but the taste is pure heaven. Just un-wrap the end of a stick of butter, and rub it over the tops and sides until they are all glossy and ready to serve.

Variations
Once you’ve mastered the basic recipe, it’s time to make some variations. Making clover-leaf rolls is so easy! Just make smaller balls of dough and add 3 each to each spot in a muffin tin! You can also add flavorings to your bread dough before shaping and baking your rolls. Try adding herbs like rosemary or chives into the dough at the beginning. You could sprinkle them with everything but the bagel seasoning before they go in the oven for some additional flavor!
Once they’ve gone through their first rise and you are forming the balls, feel free to fill them with whatever you like: pesto and cheese; pepperoni, salami slices—the possibilities are endless! The filling should go in first so when they bake up again after shaping into balls/rolls, they’ll ooze out all over everything else inside there too – yum!
It’s true: homemade yeast rolls recipes require more time than store-bought ones do (not necessarily money though!). But once you see how easy this process really is for making soft flavorful loaves at home–and how much better tasting than store bought versions–we think it will become an instant favorite around here too!
Can I freeze the dough balls to bake fresh later?
Absolutely! Frozen yeast bread dough balls can typically be stored in the freezer for up to 3 months. Ours never last this long! It’s recommended to use them within this time frame for optimal quality and to ensure the yeast remains active. Beyond 3 months, the dough balls may still be safe to eat, but the quality and rise of the baked bread may be compromised. It’s always a good idea to label the container or bag with the date of freezing to keep track of the storage time.
How to freeze dough balls to bake later:
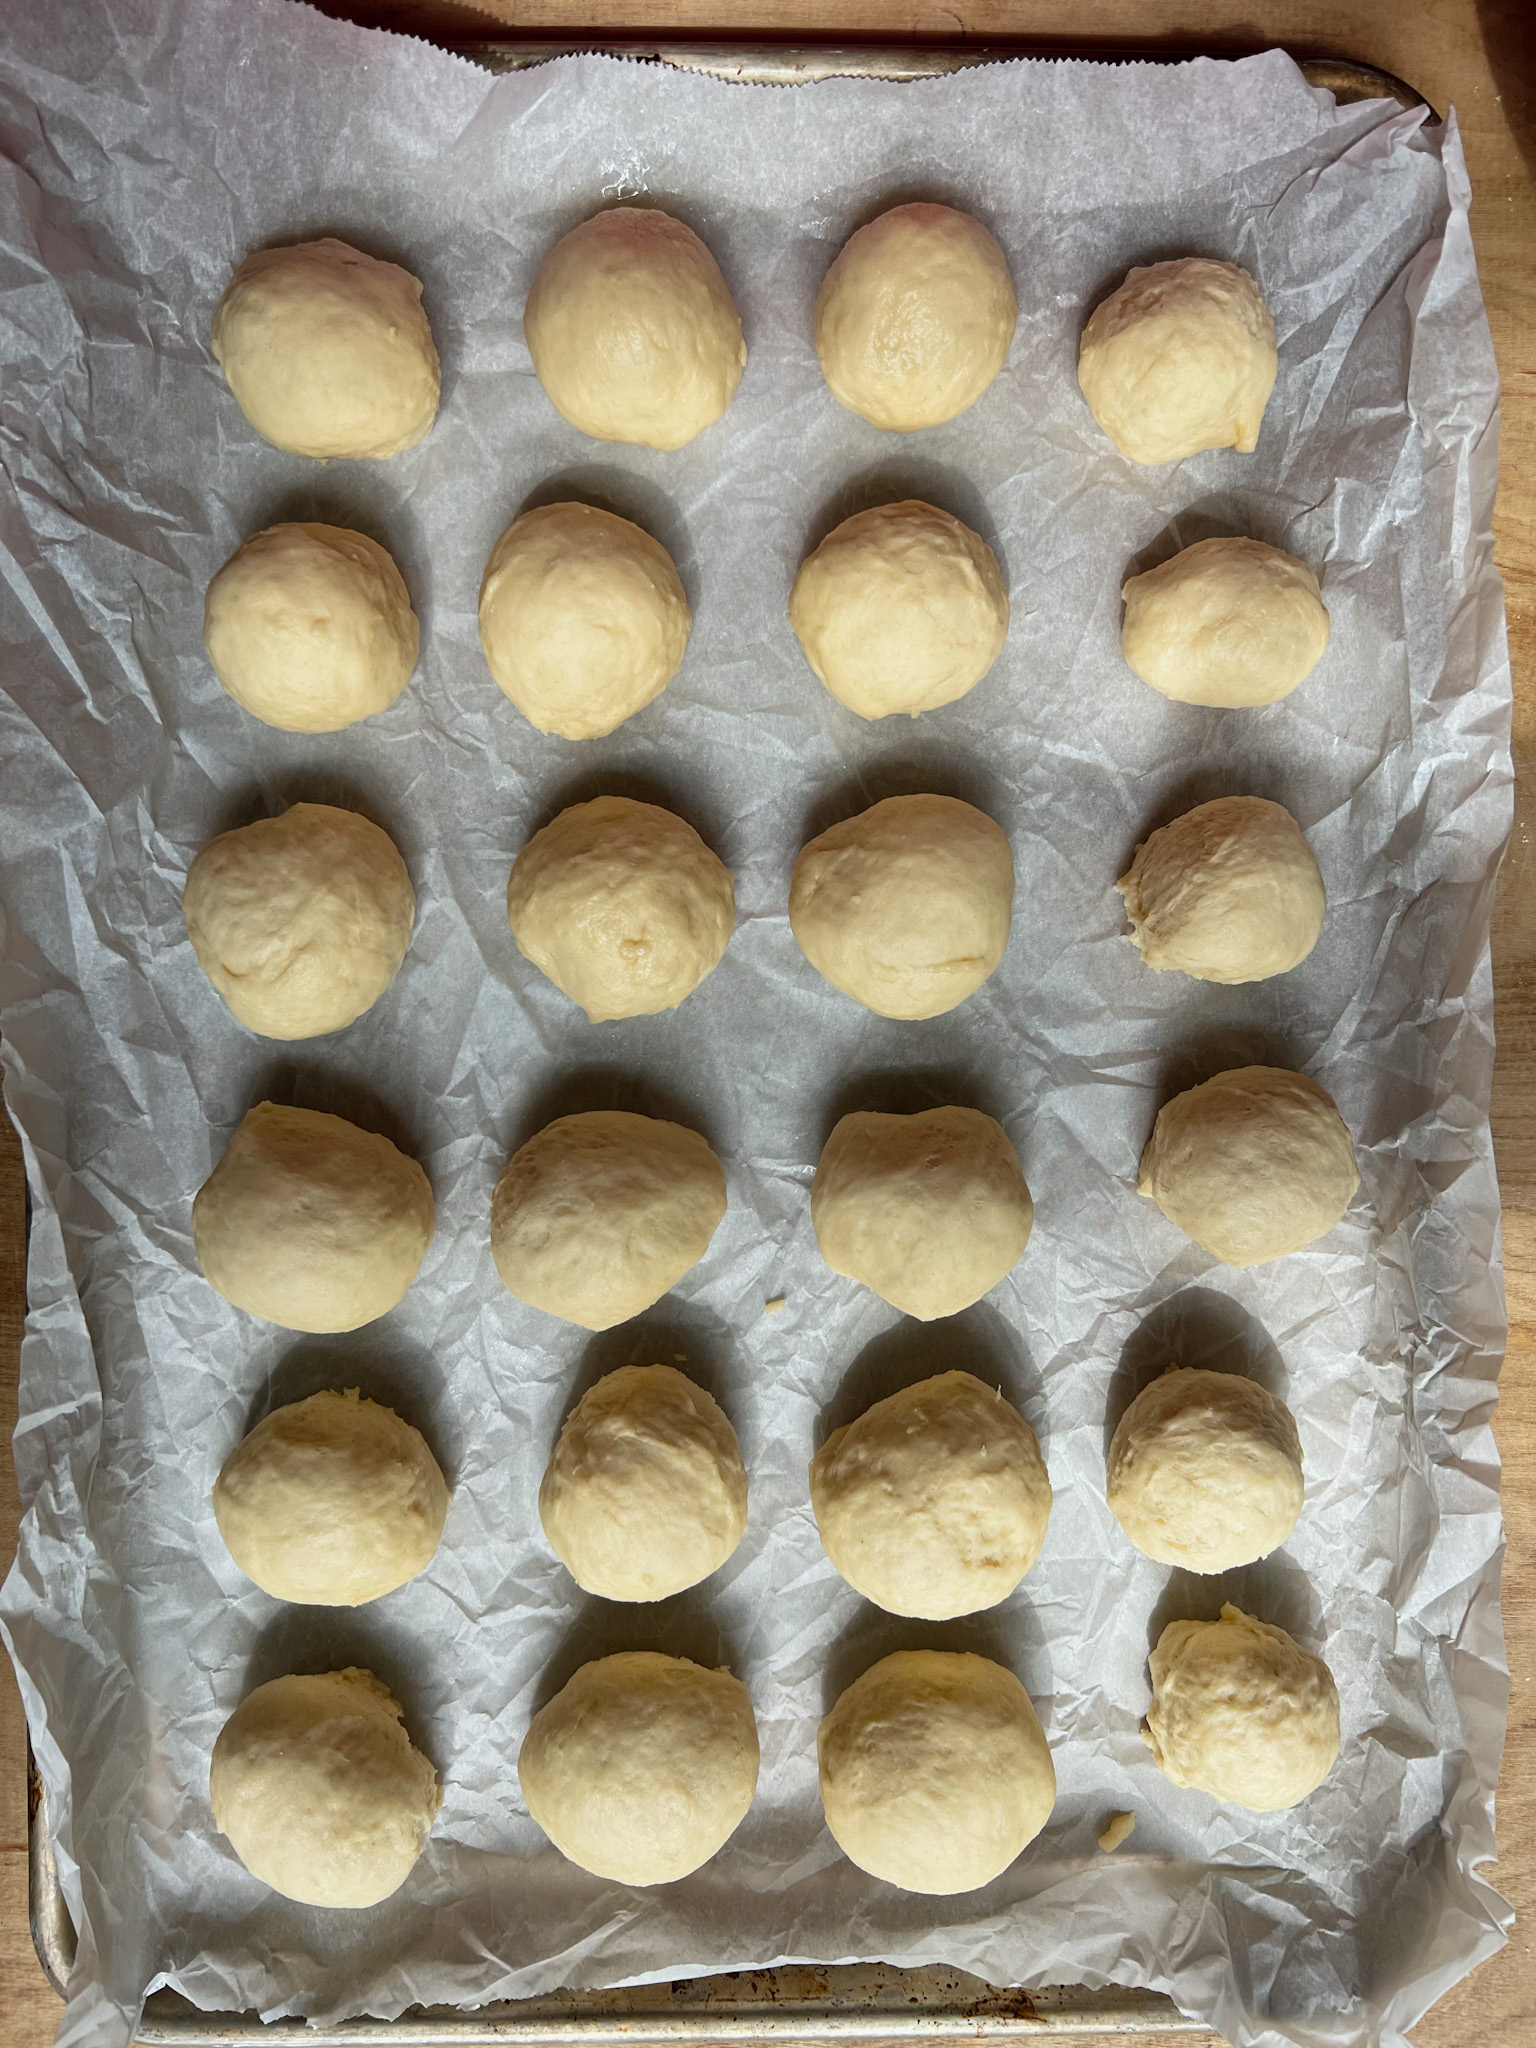
Step 1: Form the dough balls
- Line a cookie sheet with parchment paper. This will prevent the dough balls from sticking and make it easier to remove the frozen dough balls.
- Take a portion of the yeast dough and divide it into equal-sized portions, typically about the size of a golf ball or desired roll size.
- Roll each portion between your palms to form a smooth ball.
- Place the formed dough balls onto the parchment-lined cookie sheet.
- Repeat the process, leaving space between each dough ball to prevent them from sticking together during freezing.
- Continue forming dough balls until all the dough is used or you have the desired number of yeast dough balls.
Step 2: Freezing the Yeast Dough Balls
- Place the cookie sheet with the formed dough balls into the freezer.
- Allow the dough balls to freeze for at least 1-2 hours or until they are firm and solid.
- Freezing times may vary depending on your freezer temperature and the size of the dough balls.
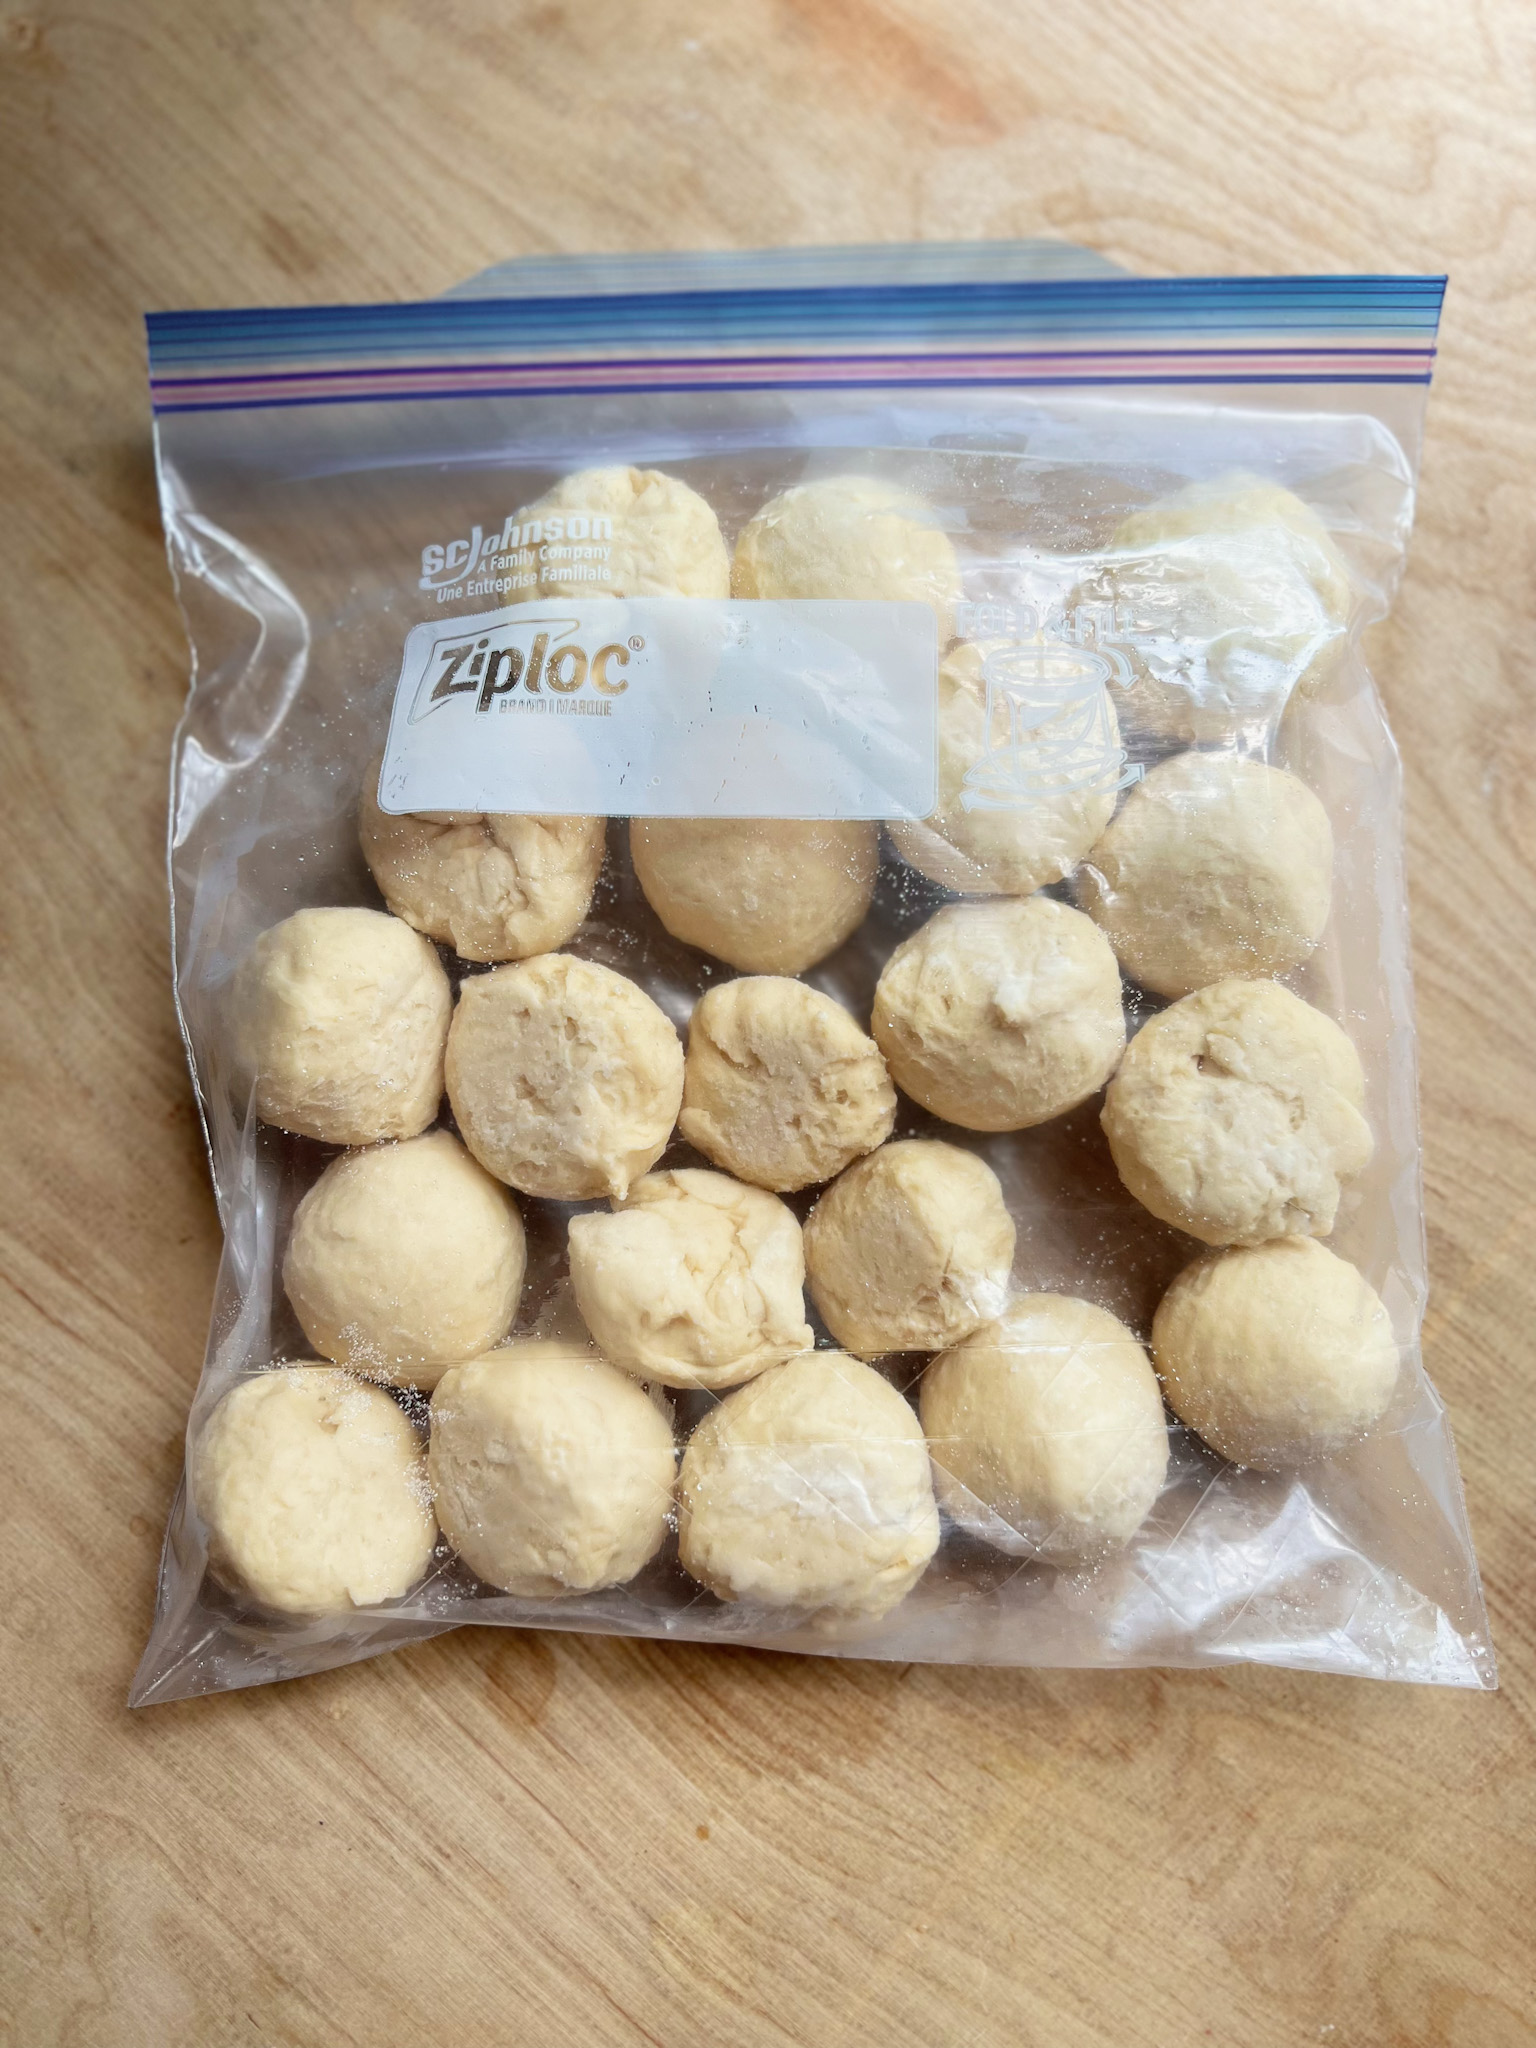
Step 3: Storing the Frozen Yeast Dough Balls
- Once the dough balls are frozen, remove the cookie sheet from the freezer.
- Transfer the frozen dough balls into a freezer-safe container or bag.
- Label the container or bag with the date and type of rolls for future reference.
- Seal the container or bag tightly, ensuring no air can enter.
- Return the container or bag to the freezer for long-term storage.
Step 4: Thawing and Baking the Yeast Rolls
- When you are ready to bake fresh yeast rolls, remove the desired number of dough balls from the freezer.
- Place the thawed dough balls on a parchment-lined baking sheet, leaving space between each ball for rising and spreading.
- Cover the dough balls loosely with oiled plastic wrap.
- Allow the dough balls to thaw and rise at room temperature for 2-3 hours or until they have doubled in size.
- Preheat your oven and follow above instructions to bake rolls.
Note: Frozen yeast dough balls can typically be stored in the freezer for up to 3 months. Remember to adjust the baking time accordingly if you are using a different recipe or size of dough balls.
Equipment
- 2 Bowls
- 1 Whisk
- 1 Spatula
- Plastic Wrap
Ingredients
Instructions
Directions for easy yeast roll dough:
- Whisk together the flour and salt in a bowl, Set aside.6 1/4 cups flour, 1 tablespoon salt
- Whisk the yeast and sugar into the warm milk in another bowl and let stand for 5 minutes.4 1/2 teaspoons active dry yeast, 1/2 cup sugar, 2 cups warm whole milk
- Whisk the eggs and butter into the milk-yeast mixture.2 eggs, 1/4 cup butter melted and cooled
- Make a well in the flour mixture and pour the milk into the middle. Use a stiff spatula to mix the wet and dry ingredients together thoroughly.
- Cover the bowl with a warm moist dish towel for 15 minutes.
- Uncover the dough and dump out onto a lightly floured work area. Dust the dough with flour and knead for 5 minutes or until the dough forms a stiff ball. Oil a bowl with vegetable oil and place the dough ball seam side down into the bowl. Cover the top of the dough 2 teaspoons of vegetable oil to prevent cracking. Cover the bowl with a warm moist dish towel. Place the covered bowl in a warm place to rise. It should take about one hour for the dough to double in size.
- Use butter to grease a large baking pan.
- After the dough has doubled in size, flour a work surface. Pour out dough onto the floured surface. Using floured hands, pat dough out to be about the size of the pan you will be using. Use a bench scraper to cut the dough long ways into 2 halves. Now cut each of those long halves again longways. Now cut across the middle Now cut those into 3 pieces. You will have 24 pieces. At this point, you can roll these into balls using a stretching method. Simply make an okay sign with your thumb and pointer finger, and push the dough through the okay hole. Using the pointer finger of your other hand, push the dough through. It kinda forms a little balloon! Now place that twisted side down into the corner of the buttered pan, and repeat with all. Cover the rolls with plastic wrap that has been lightly sprayed with oil. These make pretty big rolls, so you can also use a bigger pan, or 2 pans, and make smaller rolls.
- Place the pans in a warm place until the dough has doubled in size. About 1 hour.
- Pre-heat the oven to 350 F. Place the rolls in the oven and bake for 35 minutes. The rolls should be golden brown. At this point insert an instant read thermometer into the center of a middle roll. You are looking for 185-190 F. If not at this temp, cover with foil (loosely) and check in 10 minutes. Once rolls are done set the pan onto a wire rack and gently rub soft butter onto the tops of the rolls.
Nutrition
You may also like these breads:


I’ve never made rolls with yeast before because I thought it would be a bit difficult, but your easy-to-follow directions have given me the confidence to give it a go. They look soft and so yummy!
Stacey.
That is so great to hear! Can’t wait till you try them!
Dina and Bruce
Great guides for beginner bread makers! If you are trying to learn how to bake yeast breads, this is a good start!
Mindy,
This is how I started with my mom. So easy!
Dina and Bruce
Totally in love with these yeast rolls. Thanks a lot for sharing. Looks perfect
Easy, fresh, homemade rolls sounds fantastic to me. I can’t wait to make these.
These rolls were really easy to make and tasty!
These rolls were so easy to make and the perfect texture.
Dannii
They were my favorite growing up. So yummy,
Thank you,
Dina and Bruce
I can’t wait to make these soft, pillowy and fabulous yeast rolls. They may not make it to the table.
Michaela,
Ha! Be sure to have plenty of butter and honey!
Thank you,
Dina and Bruce
Thank you for the thorough and clear step-by-step directions. Making anything with yeast for the first time can be overwhelming but this recipe makes the process feel much more manageable.
Elizabeth,
I remember watching my mom never measure anything, and she gave me the confidence I have today to bake!
Dina and Bruce
I love the taste of bread and rolls made fresh with yeast. I put my daughter to work making these and they turned out fabulous! I think I inhaled about 3 before I stopped myself. There’s just something about fresh homemade rolls!
Soft and fluffy just how I like my rolls! Such an easy recipe too.
I love fresh homemade rolls and they make the house smell so good while they’re baking. I’m going to share this recipe with my daughter, too!
I made the clover leaf version of these rolls and the kids thought it was the coolest thing ever. I’ll definitely be making this recipe again.
This was such an easy recipe to make! I’ll be making these fluffy rolls with a lot of main dishes, especially soups and stews.
These rolls turned out great! Thanks for sharing this easy recipe.
Maayke,
That is so great! Glad you like them!
Dina and Bruce
These truly are the easiest yeast rolls I have ever made. They were perfect and my family devoured them.
Kathleen
So happy the family liked them! Yay!
Dina and Bruce
Made these easy yeast rolls and our whole family devoured them – warm, fluffy perfection!
Sandhya,
Oh this makes us so happy!
Dina and Bruce
I love dinner rolls easy ones that are beginner friendly for people like me.
Charla,
You will be an expert in no time! So glad you like!
Dina and Bruce
Simple, soft, fluffy and delicious! We love making homemade bread, but we sometimes forget that the simple things are sometimes the most delicious! Made these together with my husband last night to serve alongside dinner, and we both enjoyed both the process and eating them 🙂
Leva,
That is what life is all about! So glad you enjoyed them!
Thank you,
Dina and Br4uce
Sooo Good! Awesome idea with the clover leaf rolls. I have to try them. Thanks for the recipe.
Lauren,
I like the clover leaf, reminds me of my mom!
Thank you,
Dina and Bruce
This recipe was so easy to follow and my rolls turned out fluffy and delicious!
These easy yeast rolls look so light, fluffy and delicious. I am putting them on my “to make” list right now.
Fabulous taste and even better instructions! Made a batch last weekend and these are going to be on my holiday menu. Mouthwatering!
Your recipe is very similar to my Grandma’s recipe I make each year. I’ve never tried making the dough into clover shaped rolls. I’m going to try that this year. Thank you so much for the inspiration!
Jill,
I bet your grandma made the best rolls! Happy Holiday Baking!
Dina and Bruce
Looking forward to trying this recipe!
Elaine and James,
Ida would always make these for holidays. Brings us great memories.
Dina and Bruce
Had my teen baker make these for dinner and she said it worked great.
Justin,
Nice! So happy!
Thank you,
Dina and Bruce
So true these rolls were quite simple to make and so fluffy! Being a novice bread maker I appreciate the detailed instructions to make this recipe. Excited to make these again and serve for our Thanksgiving gathering.
Perfect tutorial. I’m going to make these for Thanksgiving!
I love the idea of freezing these dough balls to bake later. Anything to reduce my stress levels. Thanks!
Hey Bruce and Dina! Thank you so much for this informational post. It really made working with yeast seem easier than I had built it up to in my mind, and i loved the freezing step by step tips!
These step-by-step directions were perfect and they turned out super soft. Will definitely be making this again! Thank you.
Oh yum! Such a wonderful and easy recipe for the upcoming holidays. These rolls look so light and fluffy.